一、实验环境:
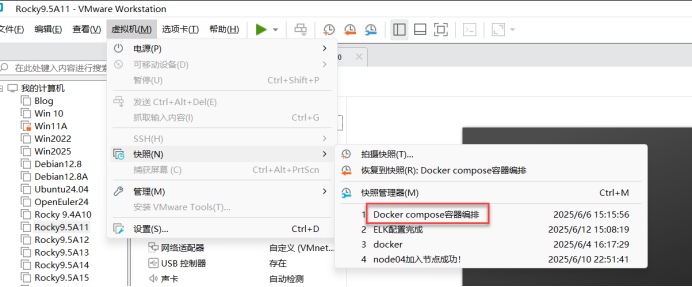
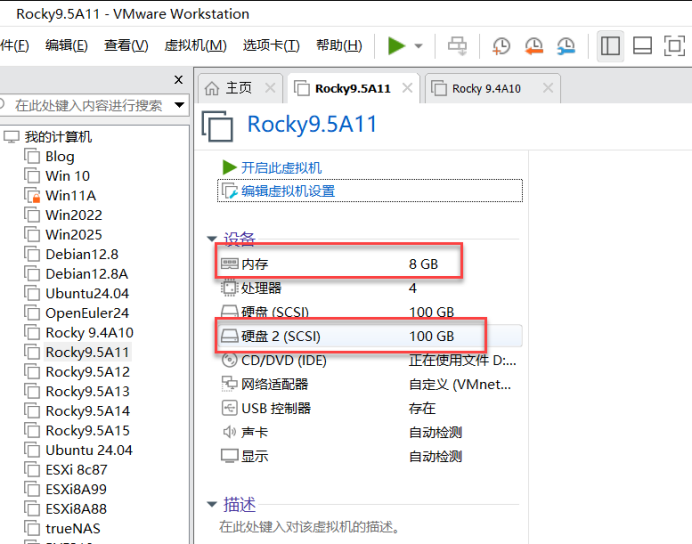
还原至:docker compose容器编排,内存8G,4核CPU,添加一块100G硬盘
二、对sdb磁盘格式化,后分区
[root@server11 ~]# reboot
[root@server11 ~]# Connection closing...Socket close.
Connection closed by foreign host.
Disconnected from remote host(192.168.7.11) at 16:00:24.
Type `help' to learn how to use Xshell prompt.
[C:\~]$
Connecting to 192.168.7.11:22...
Connection established.
To escape to local shell, press 'Ctrl+Alt+]'.
WARNING! The remote SSH server rejected X11 forwarding request.
Activate the web console with: systemctl enable --now cockpit.socket
Last login: Thu Jun 12 15:59:43 2025 from 192.168.7.1
[root@server11 ~]# fdisk -l 查看分区情况
Disk /dev/sdb: 100 GiB, 107374182400 bytes, 209715200 sectors 查看的挂载硬盘
Disk model: VMware Virtual S
Units: sectors of 1 * 512 = 512 bytes
Sector size (logical/physical): 512 bytes / 512 bytes
I/O size (minimum/optimal): 512 bytes / 512 bytes
Disk /dev/sda: 100 GiB, 107374182400 bytes, 209715200 sectors
Disk model: VMware Virtual S
Units: sectors of 1 * 512 = 512 bytes
Sector size (logical/physical): 512 bytes / 512 bytes
I/O size (minimum/optimal): 512 bytes / 512 bytes
Disklabel type: dos
Disk identifier: 0x2defc99f
Device Boot Start End Sectors Size Id Type
/dev/sda1 2048 6143 4096 2M 83 Linux
/dev/sda2 * 6144 1030143 1024000 500M 83 Linux
/dev/sda3 1030144 209715199 208685056 99.5G 8e Linux LVM
Disk /dev/mapper/rl-root: 95.51 GiB, 102550732800 bytes, 200294400 sectors
Units: sectors of 1 * 512 = 512 bytes
Sector size (logical/physical): 512 bytes / 512 bytes
I/O size (minimum/optimal): 512 bytes / 512 bytes
Disk /dev/mapper/rl-swap: 4 GiB, 4294967296 bytes, 8388608 sectors
Units: sectors of 1 * 512 = 512 bytes
Sector size (logical/physical): 512 bytes / 512 bytes
I/O size (minimum/optimal): 512 bytes / 512 bytes
[root@server11 ~]#
[root@server11 ~]# gdisk /dev/sdb 对sdb磁盘进行分区
GPT fdisk (gdisk) version 1.0.7
Partition table scan:
MBR: not present
BSD: not present
APM: not present
GPT: not present
Creating new GPT entries in memory.
Command (? for help): n 新建分区
Partition number (1-128, default 1): 1 创建第一个主导分区
First sector (34-209715166, default = 2048) or {+-}size{KMGTP}: 起始位置(为空)保持默认
Last sector (2048-209715166, default = 209715166) or {+-}size{KMGTP}:
Current type is 8300 (Linux filesystem)
Hex code or GUID (L to show codes, Enter = 8300):
Changed type of partition to 'Linux filesystem'
Command (? for help): w 保存并退出
Final checks complete. About to write GPT data. THIS WILL OVERWRITE EXISTING
PARTITIONS!!
Do you want to proceed? (Y/N): y
OK; writing new GUID partition table (GPT) to /dev/sdb.
The operation has completed successfully.
[root@server11 ~]#
[root@server11 ~]# mkfs.xfs /dev/sdb1 用文件系统为xfs格式化sdb2的磁盘
meta-data=/dev/sdb1 isize=512 agcount=4, agsize=6553535 blks
= sectsz=512 attr=2, projid32bit=1
= crc=1 finobt=1, sparse=1, rmapbt=0
= reflink=1 bigtime=1 inobtcount=1 nrext64=0
data = bsize=4096 blocks=26214139, imaxpct=25
= sunit=0 swidth=0 blks
naming =version 2 bsize=4096 ascii-ci=0, ftype=1
log =internal log bsize=4096 blocks=16384, version=2
= sectsz=512 sunit=0 blks, lazy-count=1
realtime =none extsz=4096 blocks=0, rtextents=0
[root@server11 ~]#
[root@server11 ~]# mkdir /data 递归创建磁盘挂载的V1,V2目录
[root@server11 ~]# blkid
/dev/mapper/rl-swap: UUID="9ee0c220-9558-45f9-9c57-de6ff07591b5" TYPE="swap"
/dev/sdb1: UUID="6637b8d0-a247-4be1-a6f9-88d488497459" TYPE="xfs" PARTLABEL="Linux filesystem" PARTUUID="cbee5e00-3e5f-4dfa-84d7-5e0ec14e17af"
/dev/sr0: UUID="2024-11-16-01-52-31-00" LABEL="Rocky-9-5-x86_64-dvd" TYPE="iso9660" PTUUID="5d896d99" PTTYPE="dos"
/dev/mapper/rl-root: UUID="d4a7b5e1-2ee1-4e30-8100-18c2c4ebcc02" TYPE="xfs"
/dev/sda2: UUID="a382267c-95f6-4e5a-9180-52f02890f391" TYPE="xfs" PARTUUID="2defc99f-02"
/dev/sda3: UUID="BEqe5L-VFGE-VH11-m82D-o6UP-LDqm-x0sASf" TYPE="LVM2_member" PARTUUID="2defc99f-03"
/dev/sda1: PARTUUID="2defc99f-01"
[root@server11 ~]# vim /etc/fstab 编辑开机启动配置文件
UUID=6637b8d0-a247-4be1-a6f9-88d488497459 /data xfs defaults 0 0
表示sdb1的磁盘挂载到data目录下 xfs文件系统xfs 默认参数 不备份 不检查磁盘
[root@server11 ~]# systemctl daemon-reload 重新加载系统进程
[root@server11 ~]#
[root@server11 ~]# mount -a 重新加载挂载项
[root@server11 ~]# df -hT 查看磁盘容量
Filesystem Type Size Used Avail Use% Mounted on
devtmpfs devtmpfs 4.0M 0 4.0M 0% /dev
tmpfs tmpfs 3.8G 0 3.8G 0% /dev/shm
tmpfs tmpfs 1.5G 9.1M 1.5G 1% /run
/dev/mapper/rl-root xfs 96G 4.7G 91G 5% /
/dev/sda2 xfs 436M 397M 40M 91% /boot
tmpfs tmpfs 765M 4.0K 765M 1% /run/user/0
/dev/sdb1 xfs 100G 746M 100G 1% /data
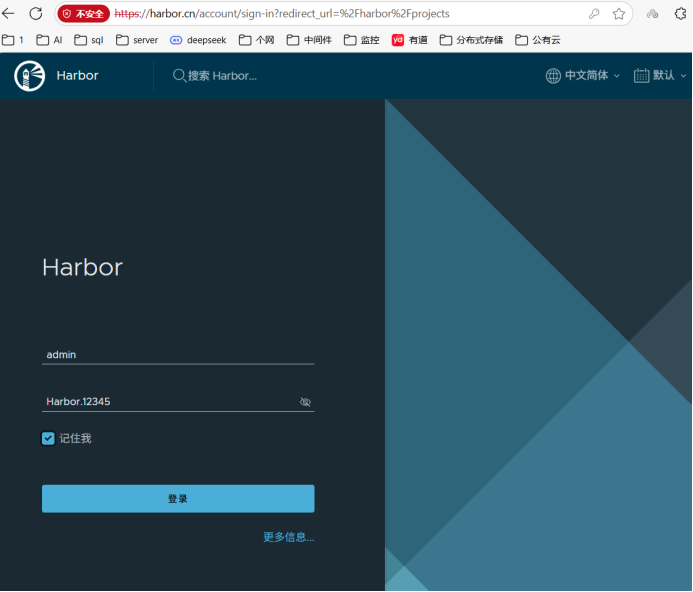
[root@server11 ~]# registry不能远程,只能本地登录,字符界面。Harbor 图形界面,可以远程。
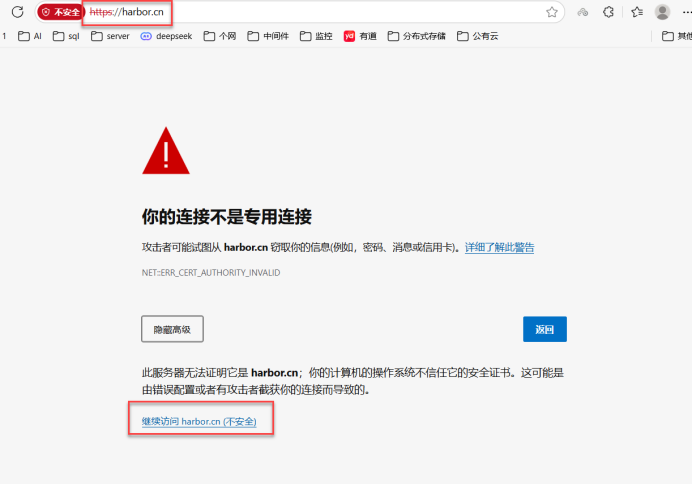
三、更改名称为harbor.cn
[root@server10 ~]# hostnamectl set-hostname harbor.cn	更改名称为harbor.cn
[root@server10 ~]# exit
四、创建密钥和证书
[root@harbor ~]# mkdir /data/ssl		创建ssl目录
[root@harbor ~]#
[root@harbor ~]# cd /data/ssl
[root@harbor ssl]# openssl genrsa -out ca.key 3072  创建ca的私钥  3072:私钥密钥的长度
[root@harbor ssl]#
[root@harbor ssl]# ls
ca.key
[root@harbor ssl]# openssl req -new -x509 -days 3650 -key ca.key -out ca.pem
You are about to be asked to enter information that will be incorporated
into your certificate request.
What you are about to enter is what is called a Distinguished Name or a DN.
There are quite a few fields but you can leave some blank
For some fields there will be a default value,
If you enter '.', the field will be left blank.
-----
Country Name (2 letter code) [XX]:CN
State or Province Name (full name) []:BJ
Locality Name (eg, city) [Default City]:BJ
Organization Name (eg, company) [Default Company Ltd]:harbor.cn
Organizational Unit Name (eg, section) []:K8S
Common Name (eg, your name or your server's hostname) []:Zoe
Email Address []:1319276778@qq.com
[root@harbor ssl]# ls
ca.key  ca.pem
[root@harbor ssl]#
[root@harbor ssl]# openssl genrsa -out harbor.key 3072
[root@harbor ssl]#
[root@harbor ssl]# openssl req -new -key harbor.key -out harbor.csr
You are about to be asked to enter information that will be incorporated
into your certificate request.
What you are about to enter is what is called a Distinguished Name or a DN.
There are quite a few fields but you can leave some blank
For some fields there will be a default value,
If you enter '.', the field will be left blank.
-----
Country Name (2 letter code) [XX]:CN
State or Province Name (full name) []:BJ
Locality Name (eg, city) [Default City]:NJ
Organization Name (eg, company) [Default Company Ltd]:harbor.cn
Organizational Unit Name (eg, section) []:k8s
Common Name (eg, your name or your server's hostname) []:Zoe
Email Address []:1319276778@qq.com

Please enter the following 'extra' attributes
to be sent with your certificate request
A challenge password []:
An optional company name []:
[root@harbor ssl]#
五、签发证书
[root@harbor ssl]# openssl x509 -req -in harbor.csr -CA ca.pem -CAkey ca.key -CAcreateserial -out harbor.pem -days 3650		签发证书 有效期:3650天
Certificate request self-signature ok
subject=C=CN, ST=BJ, L=NJ, O=harbor.cn, OU=k8s, CN=Zoe, emailAddress=1319276778@qq.com
[root@harbor ssl]# vim /etc/chrony.conf		编辑时间同步配置文件
#pool 2.rocky.pool.ntp.org iburst
pool.ntp.aliyun.com iburst
[root@harbor ssl]# systemctl enable --now chronyd
[root@harbor ssl]#
[root@harbor ssl]#
[root@harbor ssl]# chronyc sources -v

  .-- Source mode  '^' = server, '=' = peer, '#' = local clock.
 / .- Source state '*' = current best, '+' = combined, '-' = not combined,
| /             'x' = may be in error, '~' = too variable, '?' = unusable.
||                                                 .- xxxx [ yyyy ] +/- zzzz
||      Reachability register (octal) -.           |  xxxx = adjusted offset,
||      Log2(Polling interval) --.      |          |  yyyy = measured offset,
||                                \     |          |  zzzz = estimated error.
||                                 |    |           \
MS Name/IP address         Stratum Poll Reach LastRx Last sample
===============================================================================
^+ tock.ntp.infomaniak.ch        1   9   175     6    -13ms[  -13ms] +/-   87ms
^* 119.28.206.193                2   8   337   130  +2653us[+3219us] +/-   66ms
^+ time.cloudflare.com           3   9   377    67  +7877us[+7877us] +/-  111ms
^+ 139.199.215.251               2   8   357   197  +1459us[+2010us] +/-   40ms
[root@harbor ssl]# date
Thu Jun 12 04:47:14 PM CST 2025
[root@harbor ssl]# clock -w
[root@harbor ssl]#
六、进入计划任务、检查服务状态
[root@harbor ssl]# crontab -e 进入计划任务
* * * * * /usr/bin/systemctl status chronyd || /usr/bin/systemctl restart chronyd 先检查服务状态,仅在异常时重启时间同步(*分钟 *小时 *日 *月 *星期)
[root@harbor ssl]# crontab -l
* * * * * /usr/bin/systemctl restart chronyd
[root@harbor ssl]# hostname
harbor
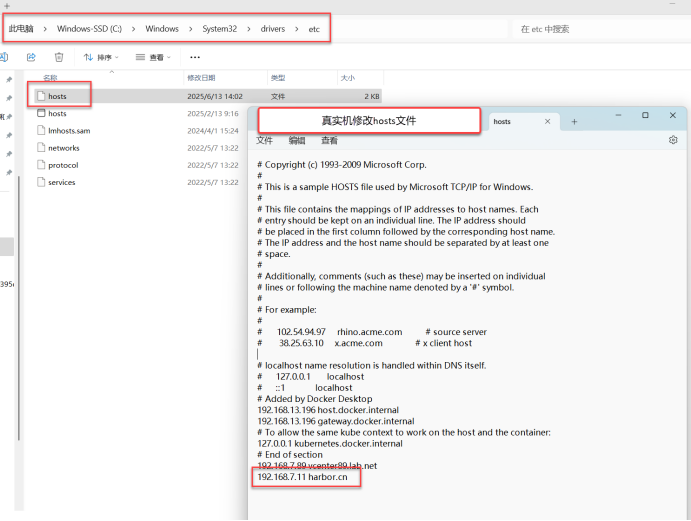
[root@harbor ssl]# vim /etc/hosts
192.168.7.11 harbor.cn
[root@harbor ssl]# systemctl status docker
● docker.service - Docker Application Container Engine
Loaded: loaded (/usr/lib/systemd/system/docker.service; enabled; preset: disabled)
Active: active (running) since Thu 2025-06-12 16:00:42 CST; 59min ago
TriggeredBy: ● docker.socket
Docs: https://docs.docker.com
Main PID: 1015 (dockerd)
Tasks: 10
Memory: 106.2M
CPU: 877ms
CGroup: /system.slice/docker.service
└─1015 /usr/bin/dockerd -H fd:// --containerd=/run/containerd/containerd.sock七、加载内核模块、创建docker配置文件
[root@harbor ssl]# docker compose version
Docker Compose version v2.36.2
[root@harbor ssl]# modprobe br_netfilter filter		直接加载内核模块
[root@harbor ssl]# vim /etc/sysctl.d/docker.conf		创建docker配置文件
net.bridge.bridge-nf-call-ip6tables = 1		启用网桥对ipv6数据包的ip6tables的规则应用
net.bridge.bridge-nf-call-iptables = 1		启用网桥对ipv4数据包的iptables的规则应用
net.ipv4.ip_forward = 1					启用IPV4转发
[root@harbor ssl]#
八、创建install目录和包解压harbor离线软件包
[root@harbor ssl]# mkdir /data/install			创建install目录
[root@harbor ssl]#
[root@harbor ssl]# cd /data/install			进入到install目录下
[root@harbor install]# tar zxf harbor-offline-installer-v2.7.3.tgz tar包解压harbor离线软件包
[root@harbor install]# ls
harbor  harbor-offline-installer-v2.7.3.tgz		进入harbor目录
[root@harbor install]# cd harbor/
[root@harbor harbor]# ls
common.sh  harbor.v2.7.3.tar.gz  harbor.yml.tmpl  install.sh  LICENSE  prepare
[root@harbor harbor]#
九、将harbor模板(tmpl)文件复制给harbor配置文件、编辑harbor配置文件
[root@harbor harbor]#
[root@harbor harbor]# cp harbor.yml.tmpl harbor.yml		将harbor模板(tmpl)文件复制给harbor配置文件
[root@harbor harbor]#
[root@harbor harbor]# vim harbor.yml			编辑harbor配置文件
5 hostname: harbor.cn			主机名harbor.cn
17   certificate: /data/ssl/harbor.pem	指定证书文件的位置
18   private_key: /data/ssl/harbor.key	指定密钥文件的位置
34 harbor_admin_password: Harbor12345 (可改可不改)	harbor管理员密码为:harbor12345
[root@harbor harbor]# cd ..
[root@harbor install]# ls
harbor harbor-offline-installer-v2.7.3.tgz
[root@harbor install]#
十、安装harbor
[root@harbor harbor]# ls
common.sh  harbor.v2.7.3.tar.gz  harbor.yml  harbor.yml.tmpl  install.sh  LICENSE  prepare
[root@harbor harbor]# ./install.sh			安装harbor

[Step 0]: checking if docker is installed ...

Note: docker version: 28.2.2

[Step 1]: checking docker-compose is installed ...
十一、建立主机映射
十二、开启另外一台server12机器,作为客户机
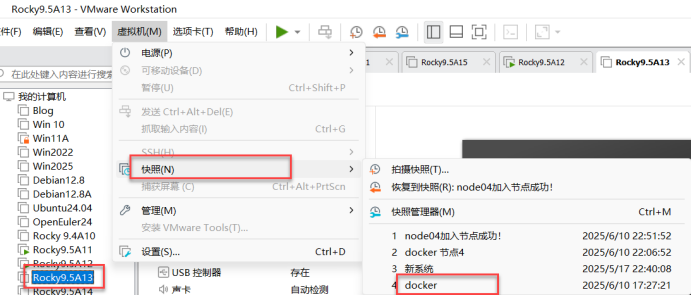
1、实验环境:快照还原至docker,开机。
2、编辑docker进程的配置文件
[root@Server12 ~]# vim /etc/docker/daemon.json server12是客户机  编辑docker进程的配置文件
        "https://registry.docker-cn.com"
    ],									“加点儿”
    "insecure-registries": ["192.168.7.11","harbor.cn"]		使用http,IP地址:192.168.7.10,仓库域名:harbor.cn
}
[root@Server12 ~]#
[root@Server12 ~]# systemctl daemon-reload		重新加载系统进程
[root@Server12 ~]# systemctl restart docker			重启docker
3、编辑hosts文件
[root@Server12 ~]# vim /etc/hosts				编辑hosts文件
127.0.0.1   localhost localhost.localdomain localhost4 localhost4.localdomain4
::1         localhost localhost.localdomain localhost6 localhost6.localdomain6
192.168.7.12 server12		创建IP地址与主机域名之间的映射
192.168.7.11 harbor.cn
4、将hosts文件远程复制到192.168.7.10的hosts文件上
[root@Server12 ~]# scp /etc/hosts 192.168.7.11:/etc/hosts
将hosts文件远程复制到192.168.7.10的hosts文件上
The authenticity of host '192.168.7.11 (192.168.7.11)' can't be established.
ED25519 key fingerprint is SHA256:xUDA0O+t2CzJjkoXTnPz4uWZHLsBka7X2jWeyssMSNo.
This key is not known by any other names
Are you sure you want to continue connecting (yes/no/[fingerprint])? yes
Warning: Permanently added '192.168.7.11' (ED25519) to the list of known hosts.
root@192.168.7.11's password:
hosts                                                                                  100%  203   186.9KB/s   00:00
[root@Server12 ~]#
5.测试从harbor拉取nginx镜像,上传镜像至harbor
[root@Server12 ~]# docker pull nginx:1.26.0从harbor仓库中拉取nginx镜像
1.26.0: Pulling from library/nginx
Digest: sha256:192e88a0053c178683ca139b9d9a2afb0ad986d171fae491949fe10970dd9da9
Status: Image is up to date for nginx:1.26.0
docker.io/library/nginx:1.26.0
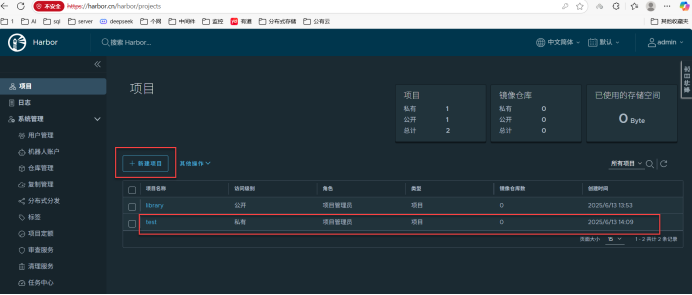
[root@Server12 ~]# docker tag nginx:1.26.0 192.168.7.11/test/nginx:1.26.0 将nginx1.26.0的镜像打标记
[root@Server12 ~]# docker images
REPOSITORY TAG IMAGE ID CREATED SIZE
192.168.7.11/test/nginx 1.26.0 94543a6c1aef 13 months ago 188MB
nginx 1.26.0 94543a6c1aef 13 months ago 188MB
[root@Server12 ~]# docker push 192.168.7.11/test/nginx:1.26.0 将nginx:1.26.0的镜像上传到harbor仓库中
The push refers to repository [192.168.7.11/test/nginx]
55ee6a06cb8d: Preparing
619ad0127e6b: Preparing
7e7eba133fb8: Preparing
8fec15e62229: Preparing
abf5f31b6a0b: Preparing
b64902b7f501: Waiting
5d4427064ecc: Waiting
unauthorized: unauthorized to access repository: test/nginx, action: push: unauthorized to access repository: test/nginx, action: push
[root@Server12 ~]# docker login 192.168.7.11 docker登录192.168.7.11的harbor仓库
Username: admin 输入管理员
Password: Harbor12345
WARNING! Your credentials are stored unencrypted in '/root/.docker/config.json'.
Configure a credential helper to remove this warning. See
https://docs.docker.com/go/credential-store/
Login Succeeded 出现这个,表示登录成功
[root@server11 ~]# docker tag nginx:1.26.0 192.168.7.10/test/nginx:1.26.0 将nginx1.26.0的镜像打标记
192.168.7.10/test/nginx:1.26.0 harbor仓库的标记
[root@Server12 ~]# docker push 192.168.7.11/test/nginx:1.26.0 将nginx:1.26.0的镜像上传到harbor仓库中
The push refers to repository [192.168.7.11/test/nginx]
55ee6a06cb8d: Pushed
619ad0127e6b: Pushed
7e7eba133fb8: Pushed
8fec15e62229: Pushed
abf5f31b6a0b: Pushed
b64902b7f501: Pushed
5d4427064ecc: Pushed
1.26.0: digest: sha256:433f8e57ead89502d08cf5bab5e1bb22760711ed29218d29ea520a5aac344672 size: 1778
[root@Server12 ~]# 十三、测试是否上传镜像成功:

[root@Server13 ~]# docker load < mariadb10.5.2.tar
b7f7d2967507: Loading layer  65.58MB/65.58MB
a6ebef4a95c3: Loading layer  991.2kB/991.2kB
838a37a24627: Loading layer  15.87kB/15.87kB
28ba7458d04b: Loading layer  3.072kB/3.072kB
fadf5ecbe4d4: Loading layer  402.9kB/402.9kB
8179bbf82947: Loading layer  11.12MB/11.12MB
78452794b5bd: Loading layer  3.886MB/3.886MB
e0b9a9a4c57f: Loading layer  1.536kB/1.536kB
2df470f82b36: Loading layer  4.695MB/4.695MB
d0abe7e5ebab: Loading layer  8.704kB/8.704kB
dfce0ddc1750: Loading layer   5.12kB/5.12kB
ab30662e1c24: Loading layer  279.5MB/279.5MB
2a75ca7bbb37: Loading layer  15.36kB/15.36kB
Loaded image: mariadb:10.5.2
[root@Server13 ~]#
十四、7.11和7.13机器上修改host文件
[root@Server13 ~]# vim /etc/hosts
192.168.7.13 server13
192.168.7.11 harbor.cn
[root@harbor harbor]# vim /etc/hosts
127.0.0.1   localhost localhost.localdomain localhost4 localhost4.localdomain4
::1         localhost localhost.localdomain localhost6 localhost6.localdomain6
192.168.7.12 server12
192.168.7.11 harbor.cn
192.168.7.13 server13
~
十五、将mariadb10.5.2的镜像上传到仓库中,上传失败
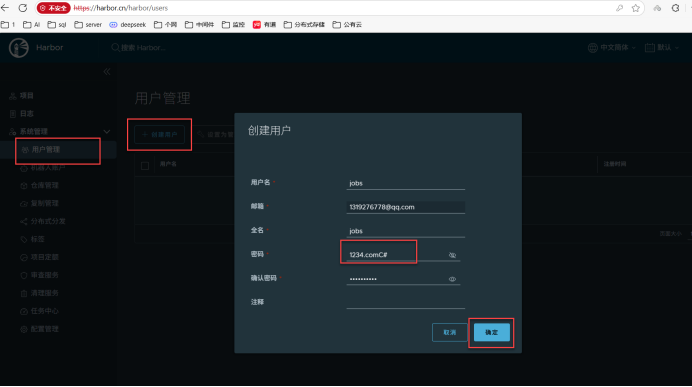
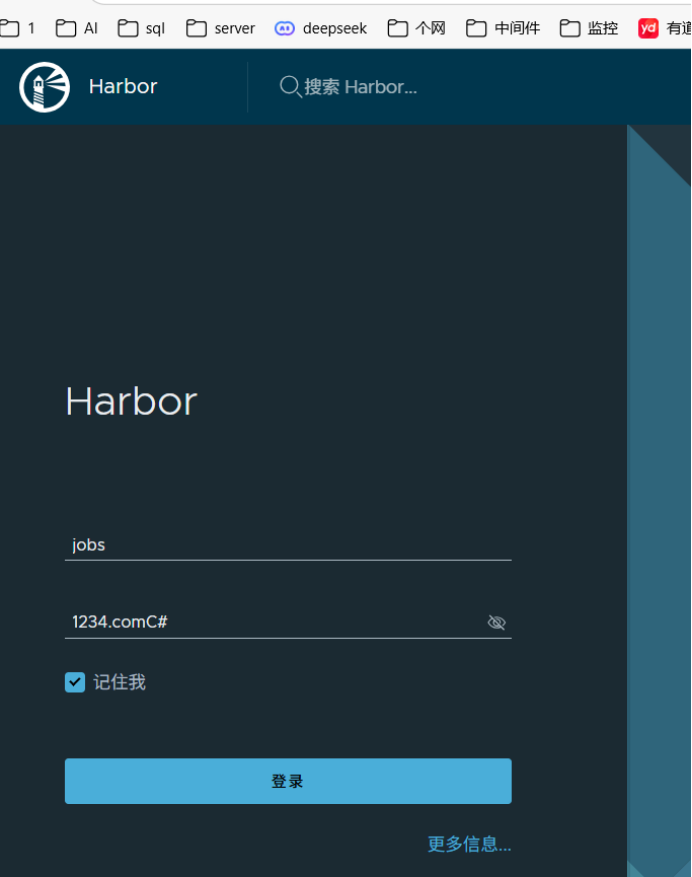
[root@Server13 ~]# docker login 192.168.7.11		docker登录192.168.7.11的仓库
Username: jobs								用户:jobs
Password:

WARNING! Your credentials are stored unencrypted in '/root/.docker/config.json'.
Configure a credential helper to remove this warning. See
https://docs.docker.com/go/credential-store/

Login Succeeded
[root@Server13 ~]# docker images
REPOSITORY   TAG       IMAGE ID       CREATED       SIZE
mariadb      10.5.2    fd055a110f74   5 years ago   360MB
[root@Server13 ~]#
[root@Server13 ~]#
[root@Server13 ~]# docker tag mariadb:10.5.2 192.168.7.11/book/mariadb:10.5.2		docker将mariadb10.5.2的镜像打上harbor仓库的标记
[root@Server13 ~]# docker images
REPOSITORY                  TAG       IMAGE ID       CREATED       SIZE
192.168.7.11/book/mariadb   10.5.2    fd055a110f74   5 years ago   360MB
mariadb                     10.5.2    fd055a110f74   5 years ago   360MB
[root@Server13 ~]# docker push 192.168.7.11/book/mariadb:10.5.2		docker将mariadb10.5.2的镜像上传到仓库中
The push refers to repository [192.168.7.11/book/mariadb]
2a75ca7bbb37: Pushed
ab30662e1c24: Pushed
dfce0ddc1750: Pushed
d0abe7e5ebab: Pushed
2df470f82b36: Pushed
e0b9a9a4c57f: Pushed
78452794b5bd: Pushed
8179bbf82947: Pushed
fadf5ecbe4d4: Pushed
28ba7458d04b: Pushed
838a37a24627: Pushed
a6ebef4a95c3: Pushed
b7f7d2967507: Pushed
10.5.2: digest: sha256:5d8f0d6ef1de0d626fc26355f2ed8965f91f7eb91273087d89e3321e27f16dd7 size: 3034
十五、查看一下镜像上传成功没:
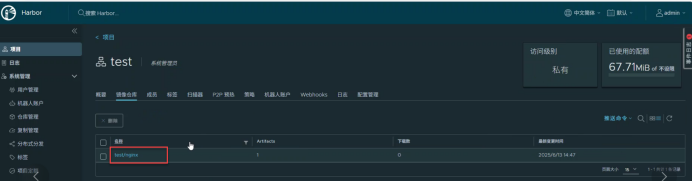
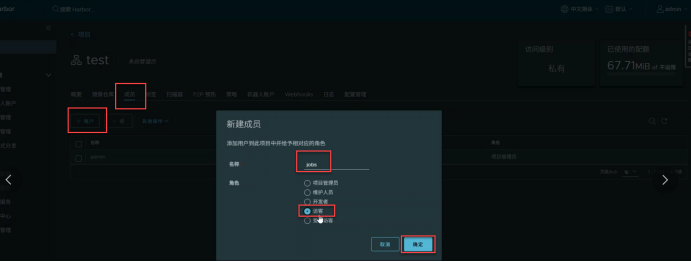
十六、添加jobs访客用户
[root@Server13 ~]# reboot 重启客户机
[root@Server13 ~]# docker logout
Removing login credentials for https://index.docker.io/v1/
[root@Server13 ~]# docker pull 192.168.7.11/test/nginx:1.26.0		dockers拉取192.168.7.10harbor仓库中的nginx1.26.0的镜像
1.26.0: Pulling from test/nginx
09f376ebb190: Pull complete
78240426b67a: Pull complete
c08c0ae256e2: Pull complete
10463a6831a8: Pull complete
bd444d50f7de: Pull complete
8785af845a38: Pull complete
694e3980a1e1: Pull complete
Digest: sha256:433f8e57ead89502d08cf5bab5e1bb22760711ed29218d29ea520a5aac344672
Status: Downloaded newer image for 192.168.7.11/test/nginx:1.26.0
192.168.7.11/test/nginx:1.26.0
[root@Server13 ~]# docker iamges
docker: unknown command: docker iamges

Run 'docker --help' for more information
[root@Server13 ~]# docker images
REPOSITORY                  TAG       IMAGE ID       CREATED         SIZE
192.168.7.11/test/nginx     1.26.0    94543a6c1aef   13 months ago   188MB	有了
192.168.7.11/book/mariadb   10.5.2    fd055a110f74   5 years ago     360MB
mariadb                     10.5.2    fd055a110f74   5 years ago     360MB
[root@Server13 ~]# docker push 192.168.7.11/test/mariadb
Using default tag: latest
The push refers to repository [192.168.7.11/test/mariadb]
An image does not exist locally with the tag: 192.168.7.11/test/mariadb
[root@Server13 ~]#
[root@Server13 ~]# docker images
REPOSITORY TAG IMAGE ID CREATED SIZE
192.168.7.11/test/nginx 1.26.0 94543a6c1aef 13 months ago 188MB
192.168.7.11/book/mariadb 10.5.2 fd055a110f74 5 years ago 360MB
mariadb 10.5.2 fd055a110f74 5 years ago 360MB
[root@Server13 ~]# docker tag mariadb:10.5.2 192.168.7.11/test/mariadb:10.5.2
[root@Server13 ~]#
[root@Server13 ~]# docker push mariadb 192.168.7.11/test/mariadb:10.5.2
docker: 'docker push' requires 1 argument
Usage: docker push [OPTIONS] NAME[:TAG]
Run 'docker push --help' for more information
[root@Server13 ~]# docker push 192.168.7.11/test/mariadb:10.5.2
The push refers to repository [192.168.7.11/test/mariadb]
2a75ca7bbb37: Preparing
ab30662e1c24: Preparing
dfce0ddc1750: Preparing
d0abe7e5ebab: Preparing
2df470f82b36: Preparing
e0b9a9a4c57f: Waiting
78452794b5bd: Waiting
8179bbf82947: Waiting
fadf5ecbe4d4: Waiting
28ba7458d04b: Waiting
838a37a24627: Waiting
a6ebef4a95c3: Waiting
b7f7d2967507: Waiting
unauthorized: unauthorized to access repository: test/mariadb, action: push: unauthorized to access repository: test/mariadb, action: push十七、测试客户机上传harbor镜像是否成功:

知识点:
知识点:
实验:部署Docker镜像仓库Harbor
前提:
1.安装好docker
2.安装完docker compose
Docker镜像仓库Harbor重要的知识点
一、基本概念
Harbor 是一个用于存储和分发Docker镜像的企业级Registry服务器。
它提供了安全的镜像存储、访问控制、镜像复制等功能。
二、关键特性
1.
访问控制:
支持基于角色的访问控制(RBAC),可以精细管理用户权限。
提供项目级别的权限管理。
2.
镜像复制:
支持跨多个Registry实例的镜像同步,便于构建分布式环境。
可以设置策略自动同步镜像。
3.
安全性:
提供HTTPS加密传输,确保数据在网络上的安全。
支持镜像签名验证,防止镜像篡改。
4.
存储管理:
支持多种存储后端,如本地文件系统、S3等。
可以配置存储配额,限制项目或用户的存储空间。
5.
高可用性:
支署架构支持高可用性配置,保证服务的稳定性。
可以通过负载均衡器分发请求。
6.
日志与审计:
提供详细的操作日志,便于监控和审计。
记录所有镜像的推送、拉取及删除操作。
三、使用场景
企业内部部署:适用于大型企业内部构建私有Docker Registry。
团队协作:方便团队成员之间共享和管理Docker镜像。
持续集成/持续部署(CI/CD):与CI/CD流程集成,自动化镜像的构建、测试和发布。
四、部署与配置
Harbor可以通过安装包或者Helm Chart进行部署。
配置文件中可以设置各种参数,如端口、存储路径、认证方式等。
五、社区与支持
Harbor是Cloud Native Computing Foundation(CNCF)的孵化项目,现已毕业成为正式项目。
拥有活跃的社区支持和丰富的文档资源。
通过以上知识点,可以看出Harbor在Docker镜像管理方面提供了全面而强大的功能,非常适合企业级的应用场景。
Harbor的访问控制是如何实现的?
Harbor的镜像复制功能有哪些具体的应用场景?
Harbor在持续集成/持续部署(CI/CD)流程中如何发挥作用?
先检查服务状态,仅在异常时重启,避免无意义操作:
* * * * * /usr/bin/systemctl status chronyd || /usr/bin/systemctl restart chronyd
net.bridge.bridge-nf-call-ip6tables = 1
net.bridge.bridge-nf-call-iptables = 1
net.ipv4.ip_forward = 1
# 启用 IPv4 转发
echo 1 > /proc/sys/net/ipv4/ip_forward
# 启用网桥对 IPv4 数据包的 iptables 规则应用
echo 1 > /proc/sys/net/bridge/bridge-nf-call-iptables
# 启用网桥对 IPv6 数据包的 ip6tables 规则应用
echo 1 > /proc/sys/net/bridge/bridge-nf-call-ip6tables