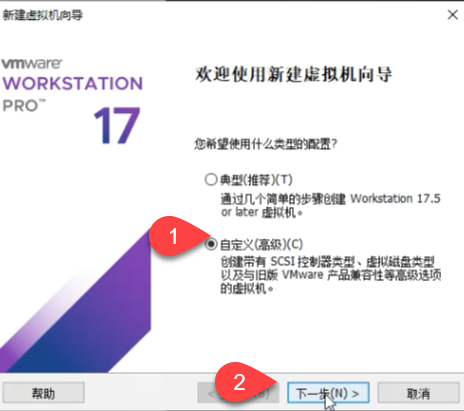
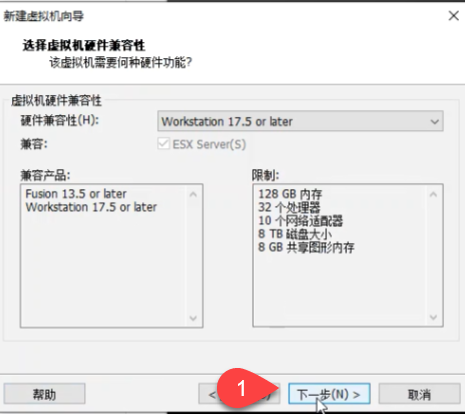
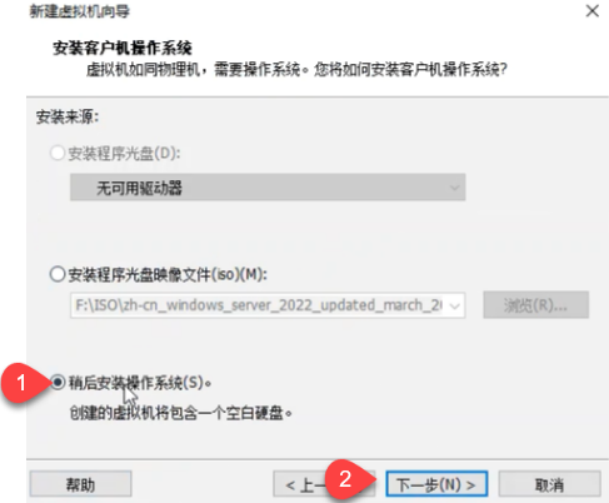
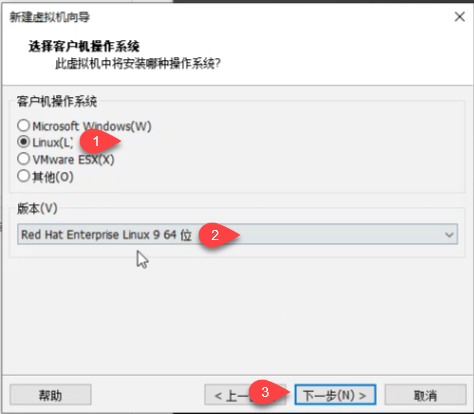
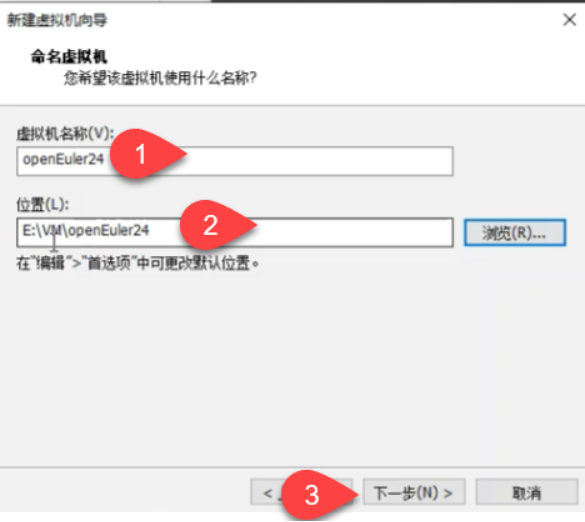
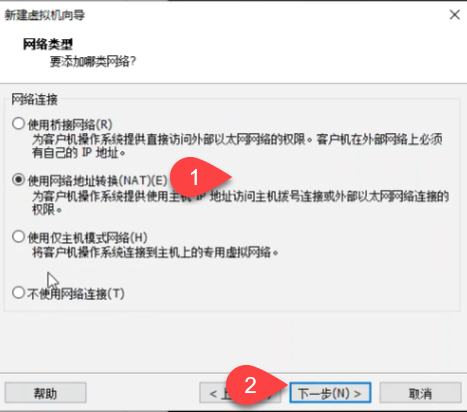
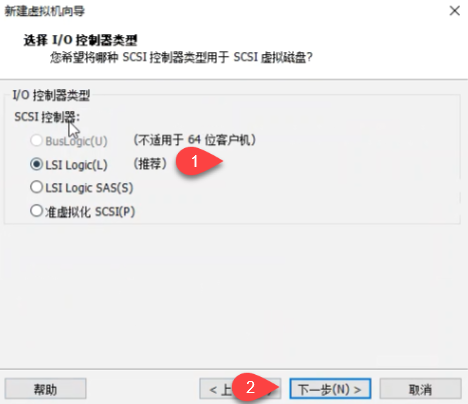
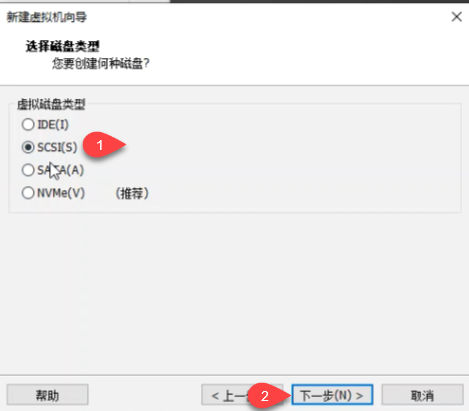
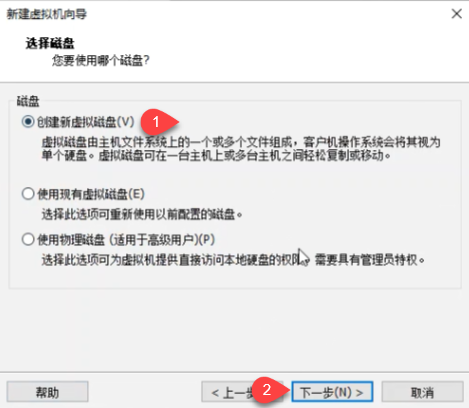
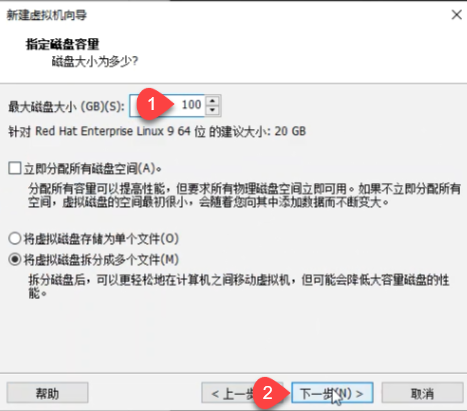
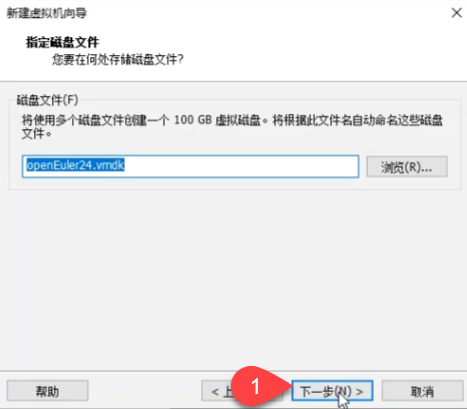
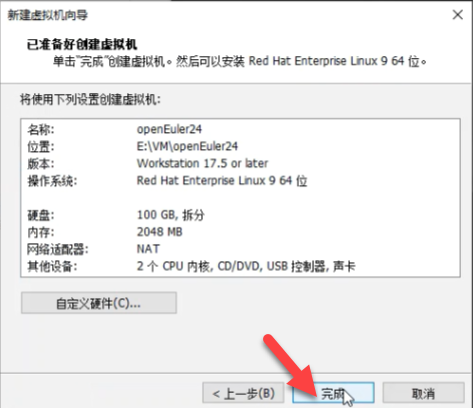
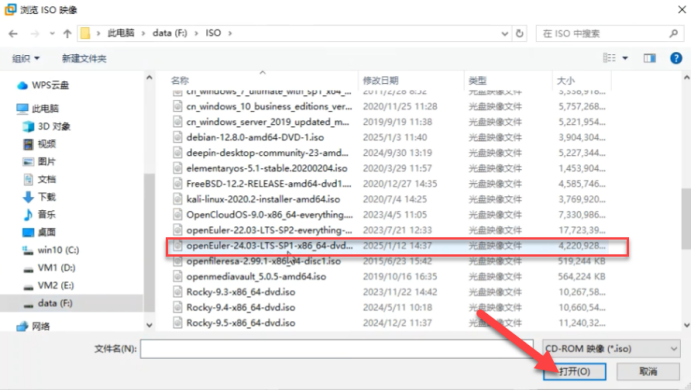
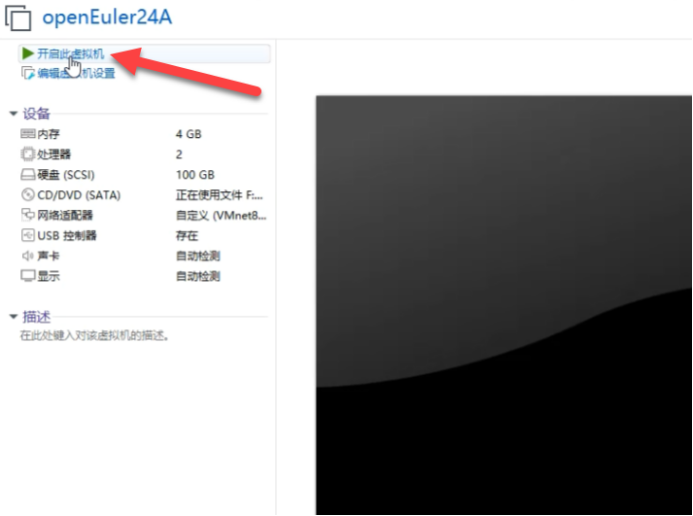
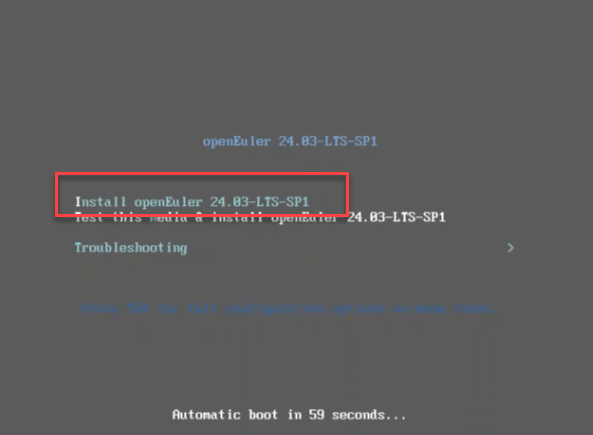
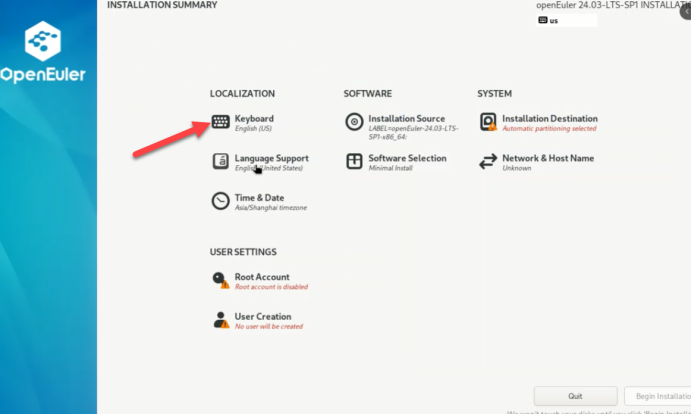
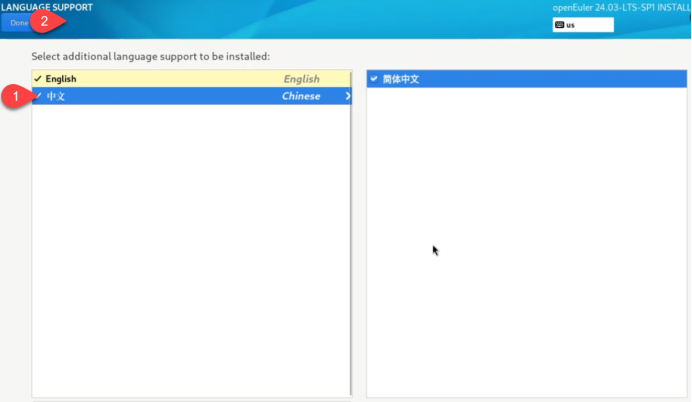
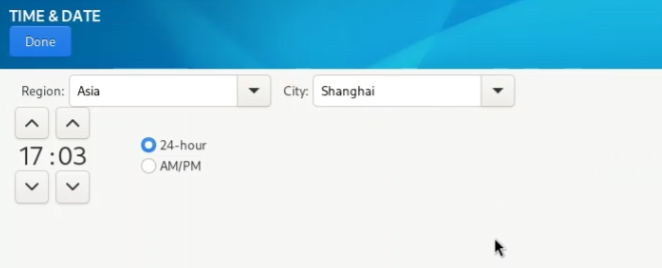
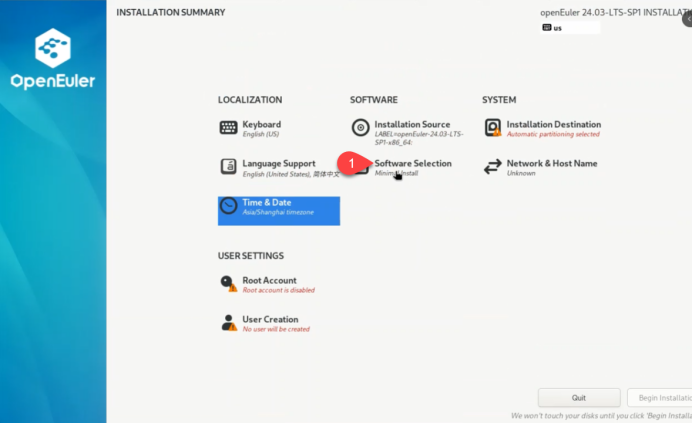
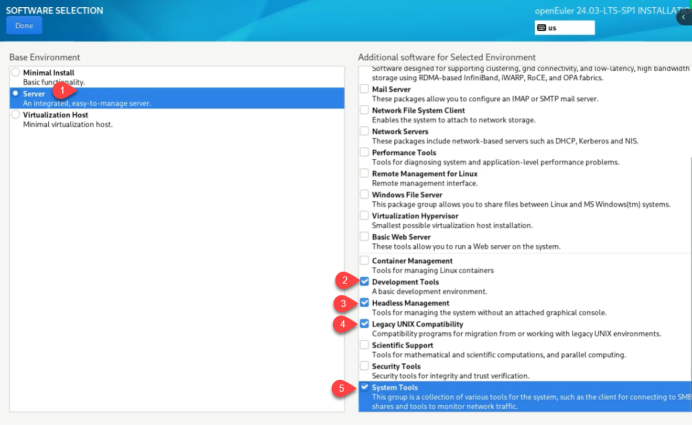
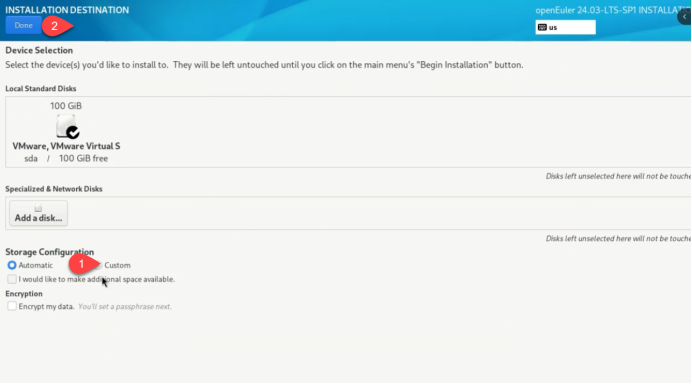
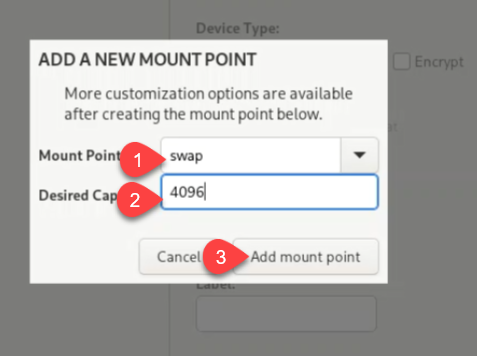
创建openEuler虚拟机


上传镜像


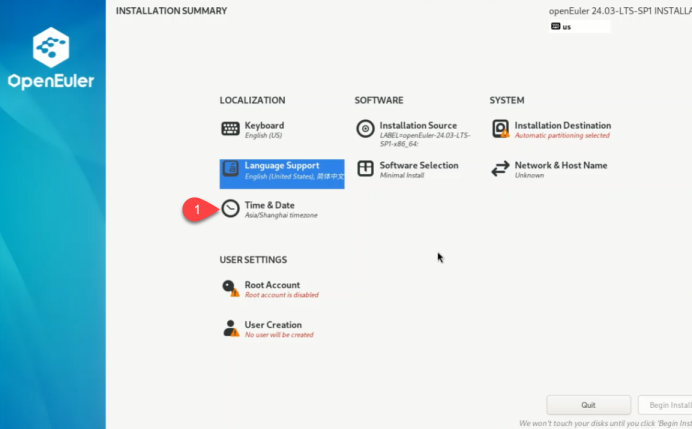
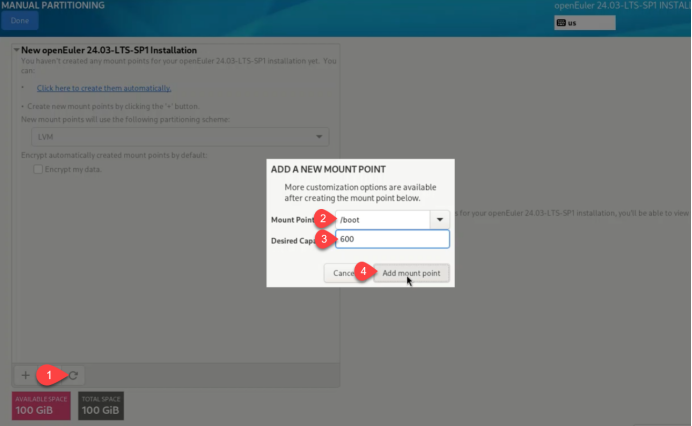
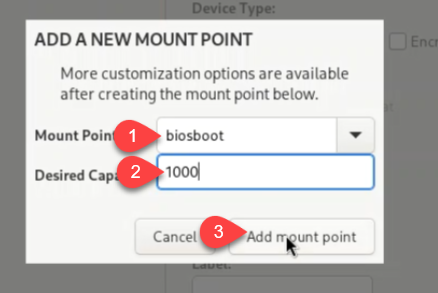
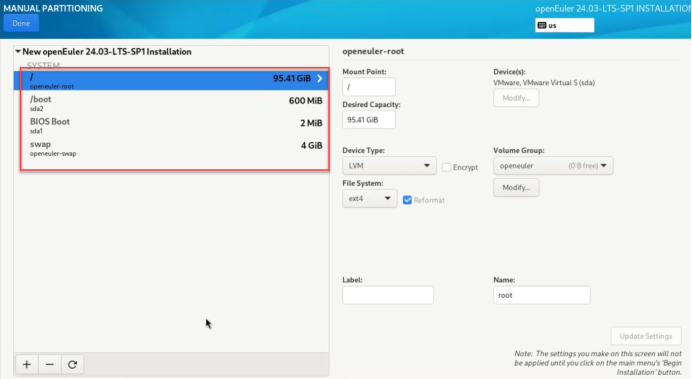
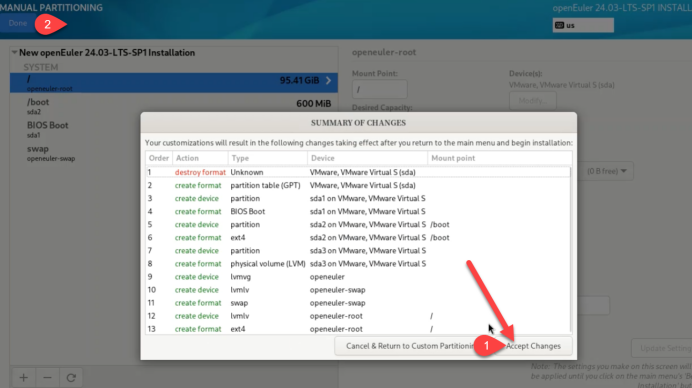
/boot 启动分区
swap 交换分区 一般时内存1倍到2倍
/ 根分区
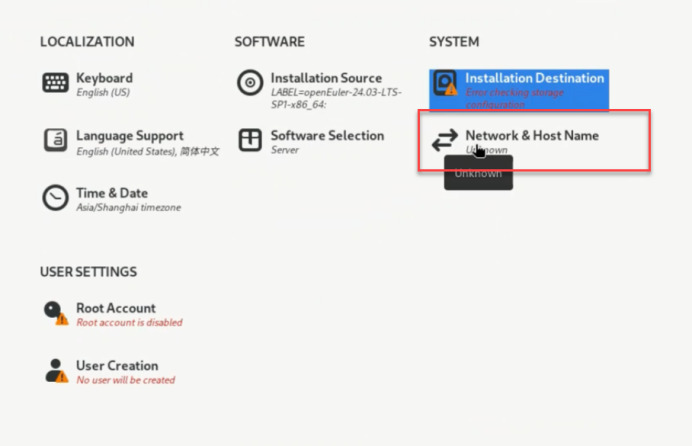
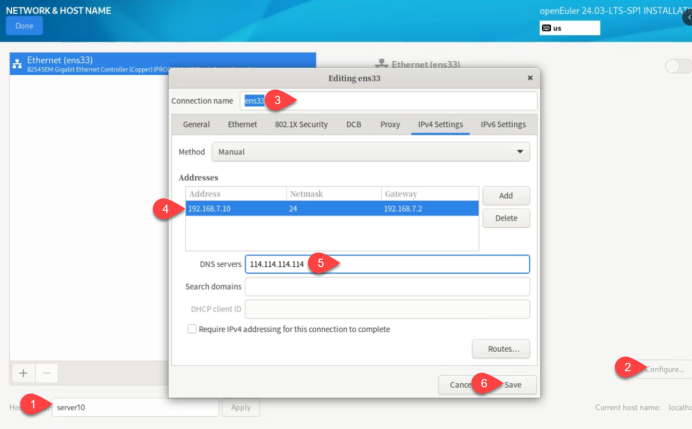
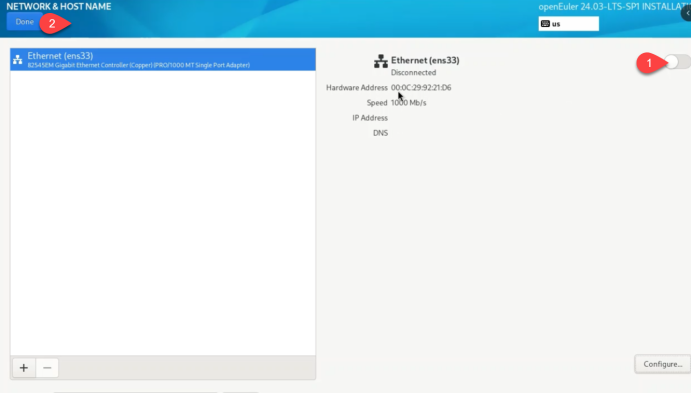

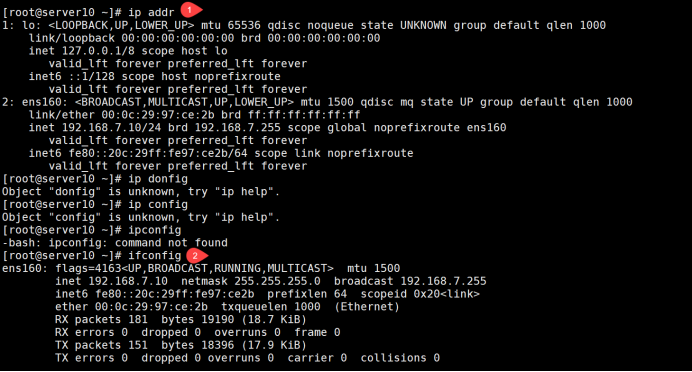
查看主机的IP地址及网卡信息

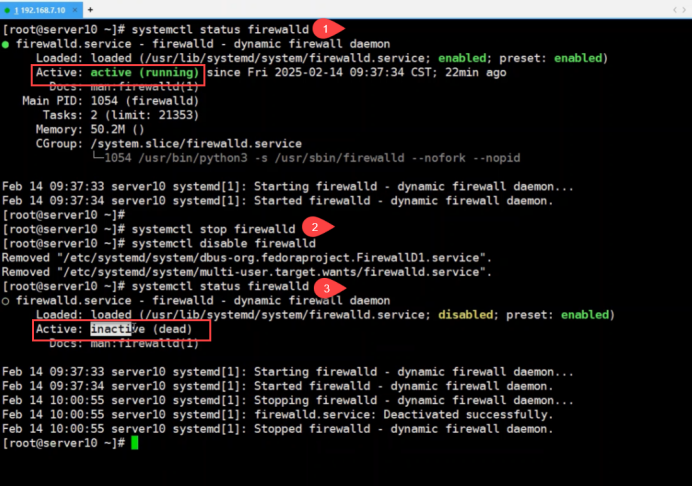
1.查看防火墙并关闭防火墙
[root@server10 ~]# systemctl status firewalld 查看防火墙的状态
firewalld.service – firewalld – dynamic firewall daemon
Loaded: loaded (/usr/lib/systemd/system/firewalld.service; enabled; preset: enabled)
Active: active (running) 活动的(正在运行)since Fri 2025-02-14 09:37:34 CST; 22min ago
[root@server10 ~]# systemctl stop firewalld 关闭防火墙
[root@server10 ~]# systemctl disable firewalld 设置防火墙开机不启动
Removed “/etc/systemd/system/dbus-org.fedoraproject.FirewallD1.service”.
Removed “/etc/systemd/system/multi-user.target.wants/firewalld.service”.
[root@server10 ~]# systemctl status firewalld查看防火墙的状态
○ firewalld.service – firewalld – dynamic firewall daemon
Loaded: loaded (/usr/lib/systemd/system/firewalld.service; disabled; preset: enabled)
Active: inactive (dead)停止
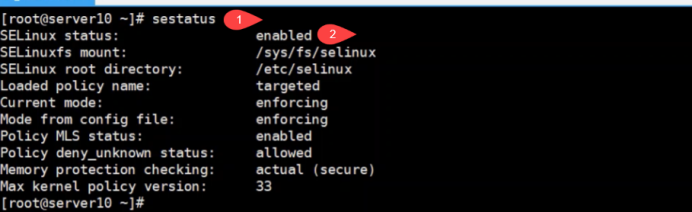
2、关闭selinuxselinuxselinuxselinuxselinuxselinux
[root@server10 ~]# sestatus 查看selinux状态
SELinux status: enabled 开启

[root@server10 ~]# nano /etc/selinux/config 编辑selinux配置文件

SELINUX=disabled 关闭selinux


root@server10 ~]# shutdown -r now 立刻重启系统
[root@server10 ~]# sestatus 查看selinux状态
SELinux status: disabled 关闭
[root@server10 ~]# shutdown -h now 立刻关闭系统

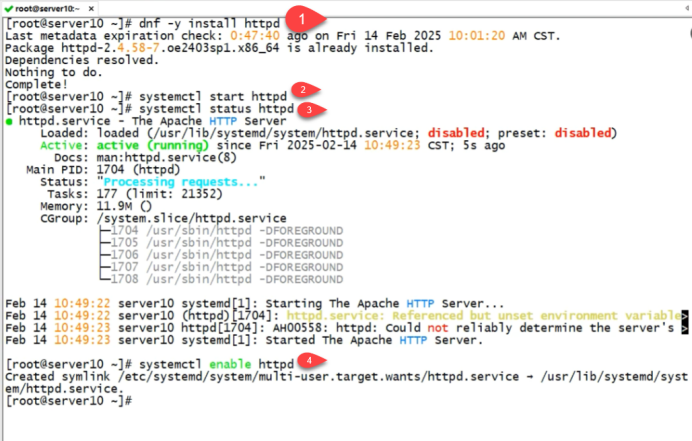
[root@server10 ~]# dnf -y install httpd 安装apache
Last metadata expiration check: 0:47:40 ago on Fri 14 Feb 2025 10:01:20 AM CST.
Package httpd-2.4.58-7.oe2403sp1.x86_64 is already installed.
Dependencies resolved.
Nothing to do.
Complete!
[root@server10 ~]# systemctl start httpd 启动Apache
[root@server10 ~]# systemctl status httpd 查看Apache的状态
● httpd.service – The Apache HTTP Server
Loaded: loaded (/usr/lib/systemd/system/httpd.service; disabled; preset: disabled)
Active: active (running) since Fri 2025-02-14 10:49:23 CST; 5s ago
Docs: man:httpd.service(8)
[root@server10 ~]# systemctl enable httpd 设置Apache开机启动

[root@server10 ~]# uname -r 查看系统内核
6.6.0-72.0.0.76.oe2403sp1.x86_64
[root@server10 ~]# dnf -y install mariadb-server mariadb 安装数据库的服务端和客户端
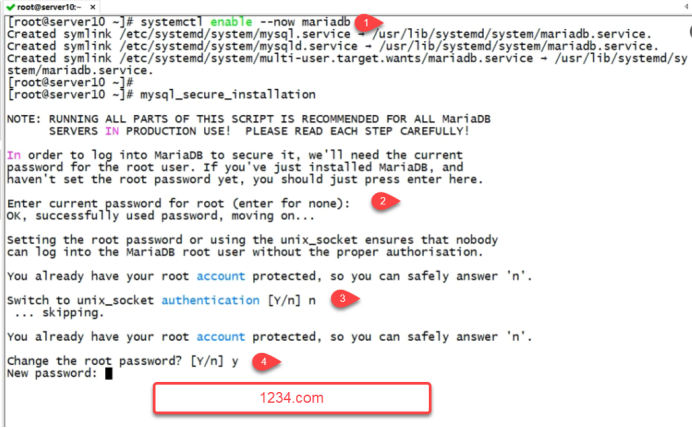
[root@server10 ~]# systemctl enable –now mariadb 启动数据库并设置开机启动
Created symlink /etc/systemd/system/mysql.service → /usr/lib/systemd/system/mariadb.service.
Created symlink /etc/systemd/system/mysqld.service → /usr/lib/systemd/system/mariadb.service.
Created symlink /etc/systemd/system/multi-user.target.wants/mariadb.service → /usr/lib/systemd/system/mariadb.service.
[root@server10 ~]#
[root@server10 ~]# mysql_secure_installation 数据库的安全设置
NOTE: RUNNING ALL PARTS OF THIS SCRIPT IS RECOMMENDED FOR ALL MariaDB
SERVERS IN PRODUCTION USE! PLEASE READ EACH STEP CAREFULLY!
In order to log into MariaDB to secure it, we’ll need the current
password for the root user. If you’ve just installed MariaDB, and
haven’t set the root password yet, you should just press enter here.
Enter current password for root (enter for none): 敲回车 输入目前的root密码吗?是
OK, successfully used password, moving on…
Setting the root password or using the unix_socket ensures that nobody
can log into the MariaDB root user without the proper authorisation.
You already have your root account protected, so you can safely answer ‘n’.
Switch to unix_socket authentication [Y/n] n 交换切换到unix接口认证吗?n
… skipping.
Change the root password? [Y/n] y更改root密码吗 y
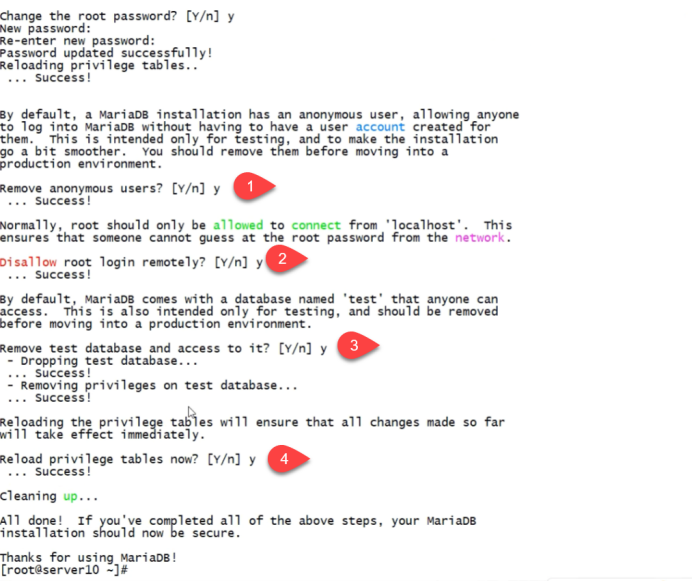
New password:
Re-enter new password:
Password updated successfully!
Reloading privilege tables..
… Success!
By default, a MariaDB installation has an anonymous user, allowing anyone
to log into MariaDB without having to have a user account created for
them. This is intended only for testing, and to make the installation
go a bit smoother. You should remove them before moving into a
production environment.
Remove anonymous users? [Y/n] y 移除匿名用户吗 Y
… Success!
Normally, root should only be allowed to connect from ‘localhost’. This
ensures that someone cannot guess at the root password from the network.
Disallow root login remotely? [Y/n] y 禁止root远程登录吗 Y
… Success!
By default, MariaDB comes with a database named ‘test’ that anyone can
access. This is also intended only for testing, and should be removed
before moving into a production environment.
Remove test database and access to it? [Y/n] y 移除测试数据库吗 Y
– Dropping test database…
… Success!
– Removing privileges on test database…
… Success!
Reloading the privilege tables will ensure that all changes made so far
will take effect immediately.
Reload privilege tables now? [Y/n] y 从新加载数据表吗 Y
… Success!
Cleaning up…
All done! If you’ve completed all of the above steps, your MariaDB
installation should now be secure.
Thanks for using MariaDB!

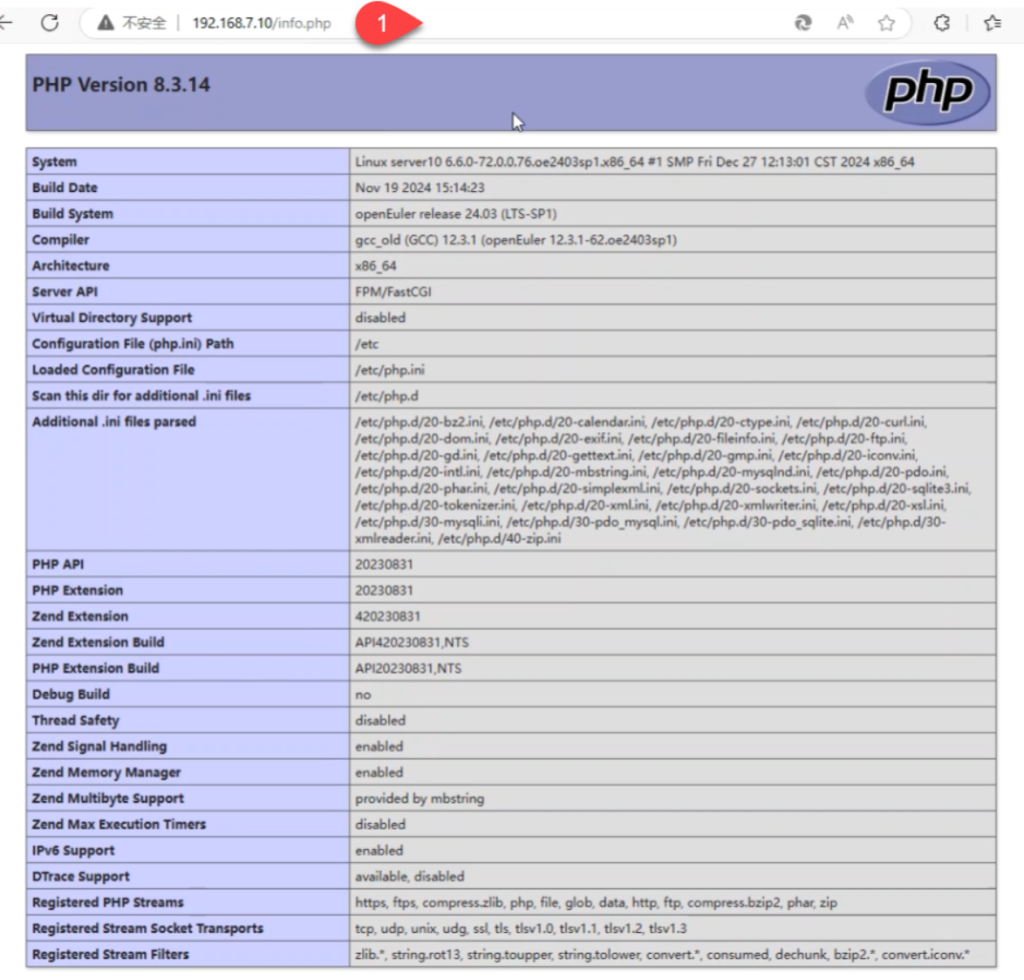
[root@server10 ~]# dnf -y install php- 安装PHP及其插件{common,gmp,fpm,curl,intl,pdo,mbstring,gd,xml,cli,zip,mysqli}

[root@server10 ~]# php -v 查看PHP版本
PHP 8.3.14 (cli) (built: Nov 19 2024 15:14:23) (NTS gcc x86_64)
Copyright (c) The PHP Group
Zend Engine v4.3.14, Copyright (c) Zend Technologies

[root@server10 ~]# vim /etc/httpd/conf/httpd.conf 编辑Apache的配置文件

59 AddHandler php-script .php 让Apache支持PHP

[root@server10 ~]# systemctl restart httpd 重启Apache
[root@server10 ~]# nano /var/www/html/info.php 创建PHP的测试页面

<?php
phpinfo();
?>

[root@server10 ~]# cd /var/www/html/ 进入Apache网站目录
[root@server10 html]# ls 显示文件及目录
info.php
[root@server10 html]# rm -rf info.php 删除PHP的测试页面
[root@server10 html]# ls 显示文件及目录
[root@server10 html]#