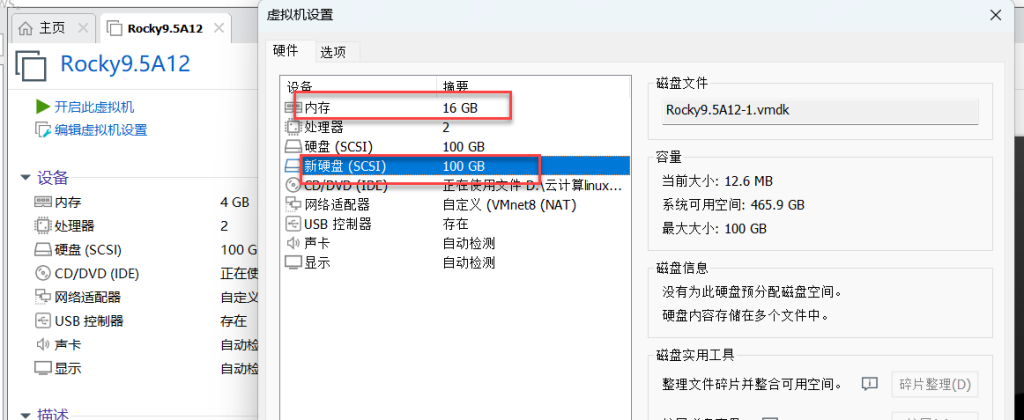
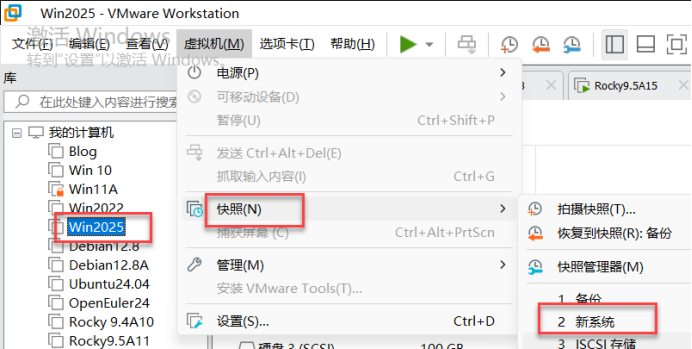
一、实验环境:系统还原至docker
二、修改计算机名并做时间同步
[root@Server12 ~]# hostnamectl set-hostname jumpserver  修改计算机名为:jumpserver

[root@Server12 ~]# exit
logout

Connection closed.

Disconnected from remote host(192.168.7.12) at 15:53:43.

Type `help' to learn how to use Xshell prompt.
[C:\~]$

Connecting to 192.168.7.12:22...
Connection established.
To escape to local shell, press 'Ctrl+Alt+]'.

WARNING! The remote SSH server rejected X11 forwarding request.
Activate the web console with: systemctl enable --now cockpit.socket

Last login: Tue Jun 10 15:53:00 2025 from 192.168.7.1
[root@jumpserver ~]# vim /etc/chrony.conf		做时间同步
pool.ntp.aliyun.com
# Use NTP servers from DHCP.
sourcedir /run/chrony-dhcp

[root@jumpserver ~]# systemctl enable --now chronyd
[root@jumpserver ~]# chronyc sources -v

  .-- Source mode  '^' = server, '=' = peer, '#' = local clock.
 / .- Source state '*' = current best, '+' = combined, '-' = not combined,
| /             'x' = may be in error, '~' = too variable, '?' = unusable.
||                                                 .- xxxx [ yyyy ] +/- zzzz
||      Reachability register (octal) -.           |  xxxx = adjusted offset,
||      Log2(Polling interval) --.      |          |  yyyy = measured offset,
||                                \     |          |  zzzz = estimated error.
||                                 |    |           \
MS Name/IP address         Stratum Poll Reach LastRx Last sample
===============================================================================
^+ 119.28.183.184                2   6    37    42  +5915us[+5915us] +/-   60ms
^* time.neu.edu.cn               2   6    37    42    +73us[  -21ms] +/- 8858us
^- time.cloudflare.com           3   6    37    43  +1953us[  -19ms] +/-  107ms
^- ntp1.flashdance.cx            2   6    37    43    +22ms[  +26ms] +/-  114ms
[root@jumpserver ~]#
[root@jumpserver ~]# date
Tue Jun 10 03:54:57 PM CST 2025
[root@jumpserver ~]# clock -w
三、sdb磁盘分区:
[root@jumpserver ~]# ls
anaconda-ks.cfg
[root@jumpserver ~]# fdisk -l
Disk /dev/sdb: 100 GiB, 107374182400 bytes, 209715200 sectors		/dev/sdb查看这个新加的硬盘
Disk model: VMware Virtual S
Units: sectors of 1 * 512 = 512 bytes
Sector size (logical/physical): 512 bytes / 512 bytes
I/O size (minimum/optimal): 512 bytes / 512 bytes


Disk /dev/sda: 100 GiB, 107374182400 bytes, 209715200 sectors
Disk model: VMware Virtual S
Units: sectors of 1 * 512 = 512 bytes
Sector size (logical/physical): 512 bytes / 512 bytes
I/O size (minimum/optimal): 512 bytes / 512 bytes
Disklabel type: dos
Disk identifier: 0x7fc8b93c

Device     Boot   Start       End   Sectors  Size Id Type
/dev/sda1          2048      6143      4096    2M 83 Linux
/dev/sda2  *       6144   1030143   1024000  500M 83 Linux
/dev/sda3       1030144 209715199 208685056 99.5G 8e Linux LVM


Disk /dev/mapper/rl_server12-root: 91.51 GiB, 98255765504 bytes, 191905792 sectors
Units: sectors of 1 * 512 = 512 bytes
Sector size (logical/physical): 512 bytes / 512 bytes
I/O size (minimum/optimal): 512 bytes / 512 bytes


Disk /dev/mapper/rl_server12-swap: 8 GiB, 8589934592 bytes, 16777216 sectors
Units: sectors of 1 * 512 = 512 bytes
Sector size (logical/physical): 512 bytes / 512 bytes
I/O size (minimum/optimal): 512 bytes / 512 bytes
[root@jumpserver ~]# mkfs /dev/sdb -f
mkfs.ext2: invalid option -- 'f'
Usage: mkfs.ext2 [-c|-l filename] [-b block-size] [-C cluster-size]
	[-i bytes-per-inode] [-I inode-size] [-J journal-options]
	[-G flex-group-size] [-N number-of-inodes] [-d root-directory]
	[-m reserved-blocks-percentage] [-o creator-os]
	[-g blocks-per-group] [-L volume-label] [-M last-mounted-directory]
	[-O feature[,...]] [-r fs-revision] [-E extended-option[,...]]
	[-t fs-type] [-T usage-type ] [-U UUID] [-e errors_behavior][-z undo_file]
	[-jnqvDFSV] device [blocks-count]
[root@jumpserver ~]# blkid
/dev/mapper/rl_server12-swap: UUID="ddfab3a2-01db-44c1-a3fd-30bf04a080ad" TYPE="swap"
/dev/sr0: UUID="2024-11-16-01-52-31-00" LABEL="Rocky-9-5-x86_64-dvd" TYPE="iso9660" PTUUID="5d896d99" PTTYPE="dos"
/dev/mapper/rl_server12-root: UUID="aea3a434-841b-47c9-9465-c1b09f5d28a7" TYPE="xfs"
/dev/sda2: UUID="9519c6f7-b62f-47ec-997a-fdab6e89cc9c" TYPE="xfs" PARTUUID="7fc8b93c-02"
/dev/sda3: UUID="4cl7pW-Vb6g-IMUk-qN6v-Gt7b-HKHI-fReRLr" TYPE="LVM2_member" PARTUUID="7fc8b93c-03"
/dev/sda1: PARTUUID="7fc8b93c-01"
[root@jumpserver ~]#
[root@jumpserver ~]#
[root@jumpserver ~]# gdisk /dev/sdb 对sdb硬盘进行分区
GPT fdisk (gdisk) version 1.0.7

Partition table scan:
  MBR: not present
  BSD: not present
  APM: not present
  GPT: not present
Creating new GPT entries in memory.
四、新建分区、格式化sdb1磁盘、重新创建sdb1磁盘
Command (? for help): n				新建分区
Partition number (1-128, default 1): 1  	创建第一个主导分区
First sector (34-209715166, default = 2048) or {+-}size{KMGTP}:
Last sector (2048-209715166, default = 209715166) or {+-}size{KMGTP}:
Current type is 8300 (Linux filesystem)
Hex code or GUID (L to show codes, Enter = 8300):
Changed type of partition to 'Linux filesystem'

Command (? for help): w			保存并退出

Final checks complete. About to write GPT data. THIS WILL OVERWRITE EXISTING
PARTITIONS!!

Do you want to proceed? (Y/N): y		写入进程
OK; writing new GUID partition table (GPT) to /dev/sdb.
The operation has completed successfully.
[root@jumpserver ~]# fdisk -l		查看磁盘的详细信息
Disk /dev/sdb: 100 GiB, 107374182400 bytes, 209715200 sectors
Disk model: VMware Virtual S
Units: sectors of 1 * 512 = 512 bytes
Sector size (logical/physical): 512 bytes / 512 bytes
I/O size (minimum/optimal): 512 bytes / 512 bytes
Disklabel type: gpt
Disk identifier: 9E782FF8-BBC7-4295-89B1-526CA62C4FC2

Device     Start       End   Sectors  Size Type
/dev/sdb1   2048 209715166 209713119  100G Linux filesystem


Disk /dev/sda: 100 GiB, 107374182400 bytes, 209715200 sectors
Disk model: VMware Virtual S
Units: sectors of 1 * 512 = 512 bytes
Sector size (logical/physical): 512 bytes / 512 bytes
I/O size (minimum/optimal): 512 bytes / 512 bytes
Disklabel type: dos
Disk identifier: 0x7fc8b93c

Device     Boot   Start       End   Sectors  Size Id Type
/dev/sda1          2048      6143      4096    2M 83 Linux
/dev/sda2  *       6144   1030143   1024000  500M 83 Linux
/dev/sda3       1030144 209715199 208685056 99.5G 8e Linux LVM


Disk /dev/mapper/rl_server12-root: 91.51 GiB, 98255765504 bytes, 191905792 sectors
Units: sectors of 1 * 512 = 512 bytes
Sector size (logical/physical): 512 bytes / 512 bytes
I/O size (minimum/optimal): 512 bytes / 512 bytes


Disk /dev/mapper/rl_server12-swap: 8 GiB, 8589934592 bytes, 16777216 sectors
Units: sectors of 1 * 512 = 512 bytes
Sector size (logical/physical): 512 bytes / 512 bytes
I/O size (minimum/optimal): 512 bytes / 512 bytes
[root@jumpserver ~]# mkfs.xfs /dev/sdb1 			格式化sdb1磁盘
meta-data=/dev/sdb1              isize=512    agcount=4, agsize=6553535 blks
         =                       sectsz=512   attr=2, projid32bit=1
         =                       crc=1        finobt=1, sparse=1, rmapbt=0
         =                       reflink=1    bigtime=1 inobtcount=1 nrext64=0
data     =                       bsize=4096   blocks=26214139, imaxpct=25
         =                       sunit=0      swidth=0 blks
naming   =version 2              bsize=4096   ascii-ci=0, ftype=1
log      =internal log           bsize=4096   blocks=16384, version=2
         =                       sectsz=512   sunit=0 blks, lazy-count=1
realtime =none                   extsz=4096   blocks=0, rtextents=0
[root@jumpserver ~]# blkid  查看磁盘的UUID号
/dev/mapper/rl_server12-swap: UUID="ddfab3a2-01db-44c1-a3fd-30bf04a080ad" TYPE="swap"
/dev/sr0: UUID="2024-11-16-01-52-31-00" LABEL="Rocky-9-5-x86_64-dvd" TYPE="iso9660" PTUUID="5d896d99" PTTYPE="dos"
/dev/mapper/rl_server12-root: UUID="aea3a434-841b-47c9-9465-c1b09f5d28a7" TYPE="xfs"
/dev/sda2: UUID="9519c6f7-b62f-47ec-997a-fdab6e89cc9c" TYPE="xfs" PARTUUID="7fc8b93c-02"
/dev/sda3: UUID="4cl7pW-Vb6g-IMUk-qN6v-Gt7b-HKHI-fReRLr" TYPE="LVM2_member" PARTUUID="7fc8b93c-03"
/dev/sdb1: UUID="d7b4fb88-f98c-448b-87e1-a61f08027b7f" TYPE="xfs" PARTLABEL="Linux filesystem" PARTUUID="04118c5c-8336-46d3-8125-a6172a09f234"  /dev/sdb1复制sdb1的UUID号
/dev/sda1: PARTUUID="7fc8b93c-01"
[root@jumpserver ~]# vim /etc/fstab
UUID=d7b4fb88-f98c-448b-87e1-a61f08027b7f /data      xfs     defaults        0 0
[root@jumpserver ~]# mkdir /data 创建data目录
[root@jumpserver ~]# systemctl daemon-reload 重新加载系统进程
[root@jumpserver ~]# mount -a 重新加载挂载项
[root@jumpserver ~]# df -hT 查看磁盘容量
Filesystem Type Size Used Avail Use% Mounted on
devtmpfs devtmpfs 4.0M 0 4.0M 0% /dev
tmpfs tmpfs 7.7G 0 7.7G 0% /dev/shm
tmpfs tmpfs 3.1G 9.1M 3.1G 1% /run
/dev/mapper/rl_server12-root xfs 92G 4.5G 88G 5% /
/dev/sda2 xfs 436M 297M 140M 69% /boot
tmpfs tmpfs 1.6G 4.0K 1.6G 1% /run/user/0
/dev/sdb1 xfs 100G 746M 100G 1% /data /dev/sdb1 硬盘做好了,之后把跳板机文件安装到这块磁盘下
[root@jumpserver ~]# 五、安装堡垒机
[root@jumpserver ~]# cd /data/
[root@jumpserver data]# curl -sSL https://resource.fit2cloud.com/jumpserver/jumpserver/releases/latest/download/quick_start.sh | bash	安装最新的堡垒机,并安装。先下载容器,后运行容器
download install script to /opt/jumpserver-installer-v4.10.1	堡垒机是以容器的显示运行
六、查看正在运行的容器
[root@jumpserver data]# docker ps 查看正在运行的容器
CONTAINER ID IMAGE COMMAND CREATED STATUS PORTS NAMES
abe6000fa788 jumpserver/core:v4.10.1-ce "./entrypoint.sh sta…" 25 seconds ago Up 14 seconds (health: starting) 8080/tcp jms_core
a4561e9bdb38 jumpserver/web:v4.10.1-ce "/docker-entrypoint.…" 25 seconds ago Up 14 seconds (health: starting) 0.0.0.0:80->80/tcp, [::]:80->80/tcp jms_web
bc1ff9e51eda jumpserver/chen:v4.10.1-ce "./entrypoint.sh wisp" 25 seconds ago Up 14 seconds (health: starting) 8082/tcp jms_chen
16503e277245 jumpserver/lion:v4.10.1-ce "./entrypoint.sh sup…" 25 seconds ago Up 14 seconds (health: starting) 8081/tcp jms_lion
a099162ab06e jumpserver/koko:v4.10.1-ce "./entrypoint.sh ./k…" 25 seconds ago Up 14 seconds (health: starting) 0.0.0.0:2222->2222/tcp, [::]:2222->2222/tcp jms_koko
b6d59f69ea62 jumpserver/core:v4.10.1-ce "./entrypoint.sh sta…" 25 seconds ago Up 14 seconds (health: starting) 8080/tcp jms_celery
18c0f16081be redis:7.0-bullseye "docker-entrypoint.s…" 50 seconds ago Up 49 seconds (healthy) 6379/tcp jms_redis
c59d469cef2c postgres:16.3-bullseye "docker-entrypoint.s…" 50 seconds ago Up 49 seconds (healthy) 5432/tcp jms_postgresql
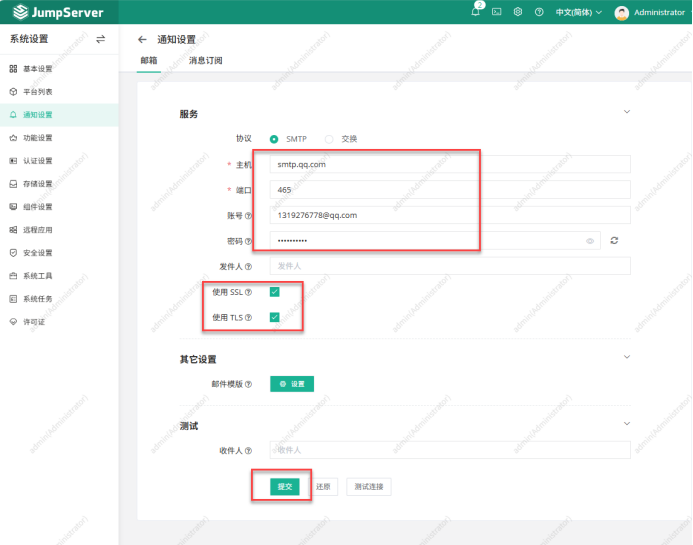
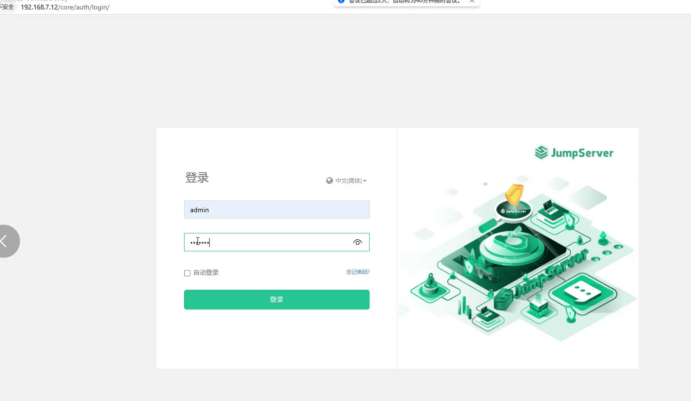
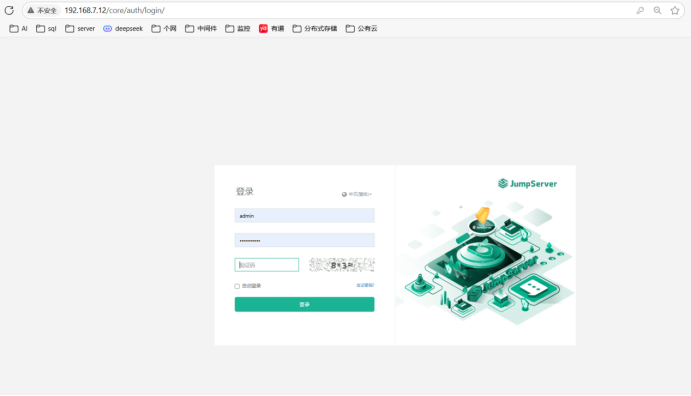
[root@jumpserver data]# 七、jumpsever搭建好了,在web上登录运行堡垒机:

八、启动jumpserver
[root@jumpserver jumpserver]# cd /opt/jumpserver-installer-v4.10.1/
[root@jumpserver jumpserver-installer-v4.10.1]# ./jmsctl.sh start
[+] Running 8/8
 ? Container jms_redis       Running
 ? Container jms_koko        Running
 ? Container jms_postgresql  Running
 ? Container jms_core        Running
 ? Container jms_chen        Running
 ? Container jms_web         Running
 ? Container jms_celery      Running
 ? Container jms_lion        Running
[root@jumpserver jumpserver-installer-v4.10.1]# exit
logout

Connection closed.

Disconnected from remote host(192.168.7.12) at 13:50:38.

Type `help' to learn how to use Xshell prompt.
九、开启另外一台server15(一台模板机:bill),还原至新系统,开机。
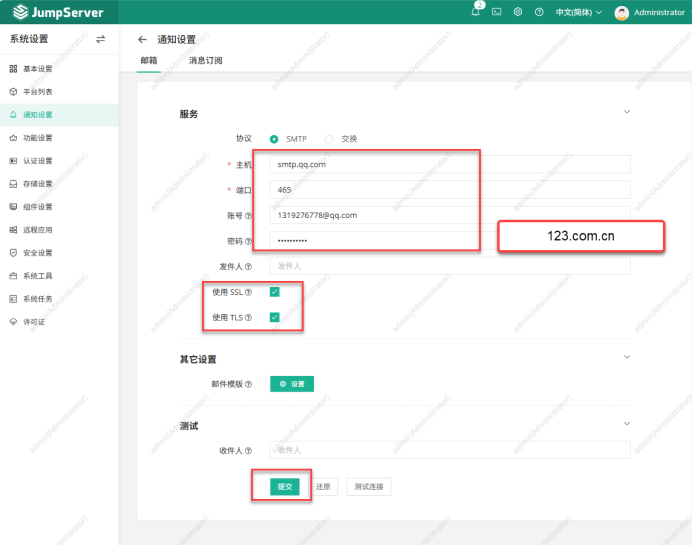
十、做时间同步:同步aliyun时间:
[root@Server15 ~]# vim /etc/chrony.conf
#pool 2.rocky.pool.ntp.org iburst
pool ntp.aliyun.com

[root@Server15 ~]# systemctl enable --now chronyd
[root@Server15 ~]# chronyc sources -v

  .-- Source mode  '^' = server, '=' = peer, '#' = local clock.
 / .- Source state '*' = current best, '+' = combined, '-' = not combined,
| /             'x' = may be in error, '~' = too variable, '?' = unusable.
||                                                 .- xxxx [ yyyy ] +/- zzzz
||      Reachability register (octal) -.           |  xxxx = adjusted offset,
||      Log2(Polling interval) --.      |          |  yyyy = measured offset,
||                                \     |          |  zzzz = estimated error.
||                                 |    |           \
MS Name/IP address         Stratum Poll Reach LastRx Last sample
===============================================================================
^- time.cloudflare.com           3   6    37    21   -204ms[ -204ms] +/-  325ms
^* 211.68.71.26                  2   6    37    22   +123us[ +261ms] +/-   93ms
^- makaki.miuku.net              3   6    37    22    +36ms[  +36ms] +/-  231ms
^+ ntp7.flashdance.cx            2   6    37    22   +144ms[ +144ms] +/-  234ms
[root@Server15 ~]# date
Wed Jun 11 01:54:56 PM CST 2025
[root@Server15 ~]# clock -w
十一、创建bill用户并生成rsa的加密密钥
[bill@Server15 ~]$ ssh-keygen -t rsa	使用rsa的加密算法生成rsa的加密密钥
Generating public/private rsa key pair.
Enter file in which to save the key (/home/bill/.ssh/id_rsa):
Created directory '/home/bill/.ssh'.
Enter passphrase (empty for no passphrase):
Enter same passphrase again:
Your identification has been saved in /home/bill/.ssh/id_rsa
Your public key has been saved in /home/bill/.ssh/id_rsa.pub
The key fingerprint is:
SHA256:PcxhUbvxUkJw/UDFLC+tLlrLd3bKhFruRI0gIKKble4 bill@Server15
The key's randomart image is:
The key's randomart image is:
+---[RSA 3072]----+
|  . . .   oo+o.+.|
| . o . .   + .+ o|
|. o     . + + .* |
| =       * o O. +|
|o .     S = = oo |
| .         o o.  |
|  E         =..  |
|           B.+o +|
|          oo=oo+.|
+----[SHA256]-----+
十二、将公钥内容写入到授权文件中
[bill@Server15 ~]$ cd .ssh/
[bill@Server15 .ssh]$ ls
id_rsa  id_rsa.pub
[bill@Server15 .ssh]$ cat id_rsa.pub > authorized_keys		将公钥内容写入到授权文件中
[bill@Server15 .ssh]$ pwd		查看当前目录
/home/bill/.ssh
[bill@Server15 .ssh]$ exit
logout
[root@Server15 ~]# cd /home/bill/.ssh/			进入到bill用户的ssh的目录下
[root@Server15 .ssh]# ls
authorized_keys授权文件  id_rsa 私钥 id_rsa.pub公钥
十三、将私钥复制到root目录下
[root@Server15 .ssh]# cp id_rsa /root				将私钥复制到root目录下
[root@Server15 .ssh]# cd
[root@Server15 ~]#
十四、编辑ssh的配置文件
44 RSAAuthentication yes		(添加)rsa的授权
 45 PubkeyAuthentication yes	(添加)开启公钥认证
 46
 47 # The default is to check both .ssh/authorized_keys and .ssh/authorized_keys2
 48 # but this is overridden so installations will only check .ssh/authorized_keys
 49 AuthorizedKeysFile      .ssh/authorized_keys		授权的密钥文件位置
 50
十五、重启ssh (加密的网络协议)
[root@Server15 ~]# systemctl restart sshd 重启sshd
[root@Server15 ~]#
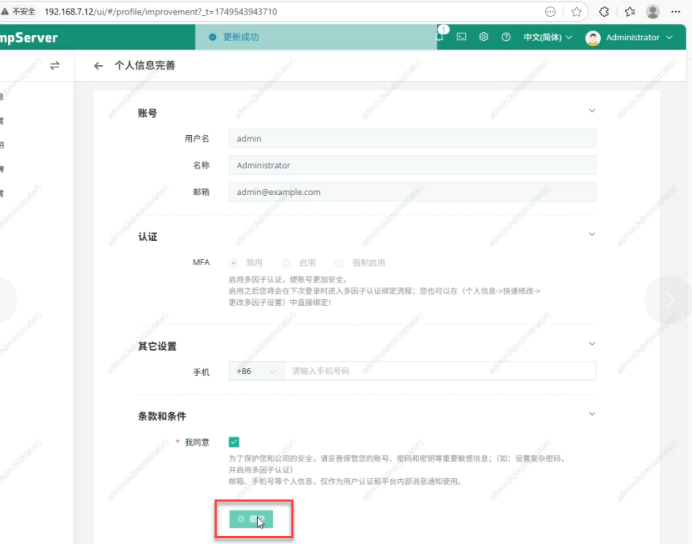
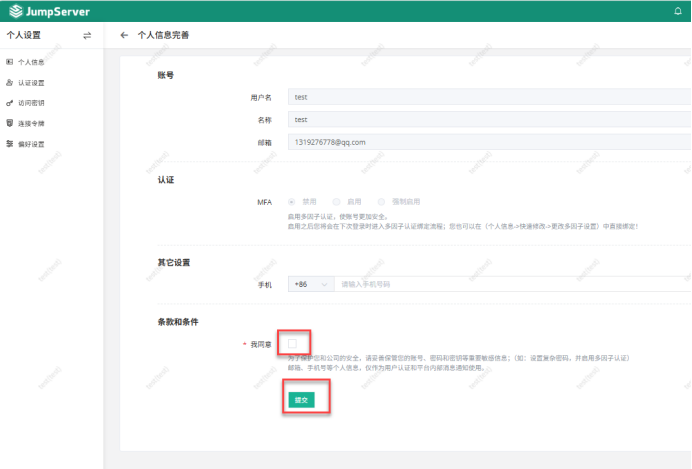
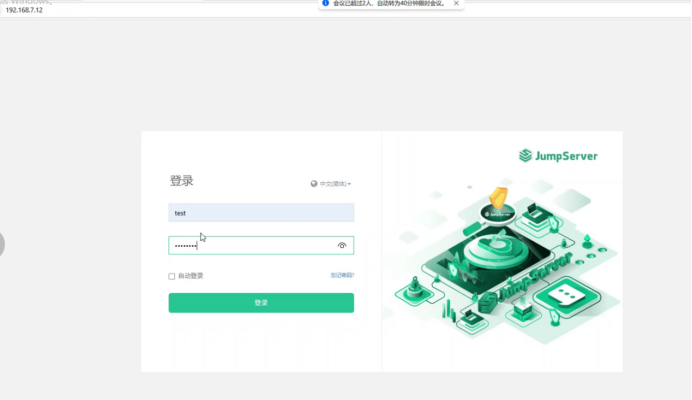
十六、登录admin账户下,绑定admin主机IP为:7.12
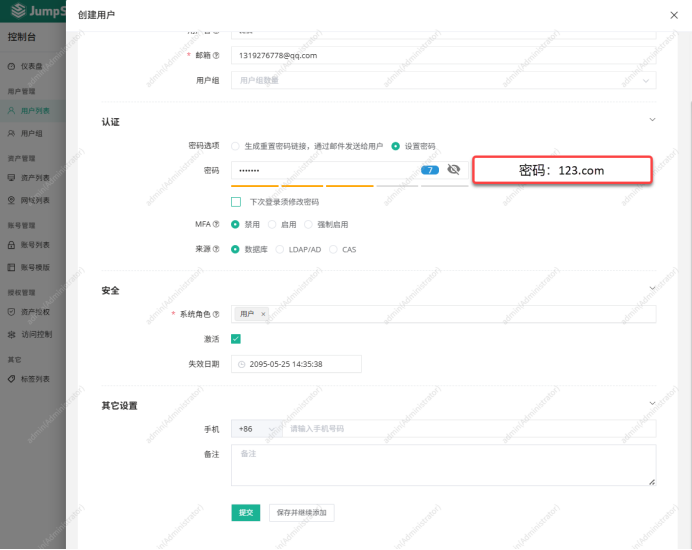
admin账户下创建两个账号,1、admin 2、test

创建test用户:
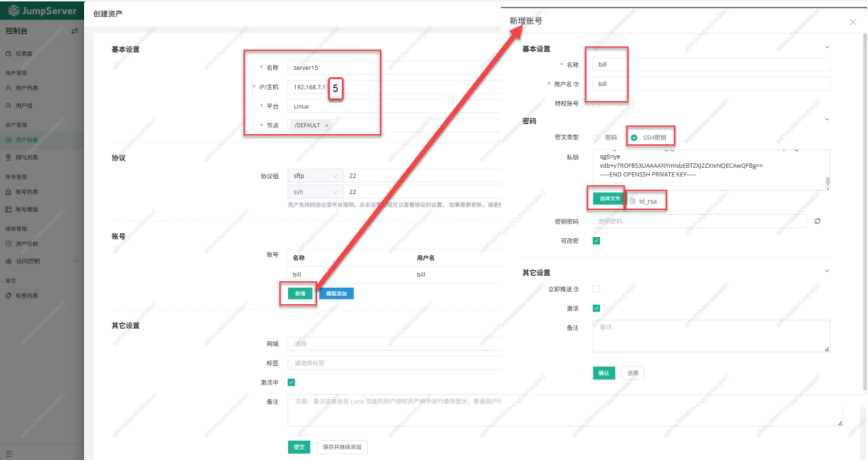
十七、server 15绑定模板机bill
十九、test作为一台监控器平台,在上面添加用户
用户1:模板bill server 15

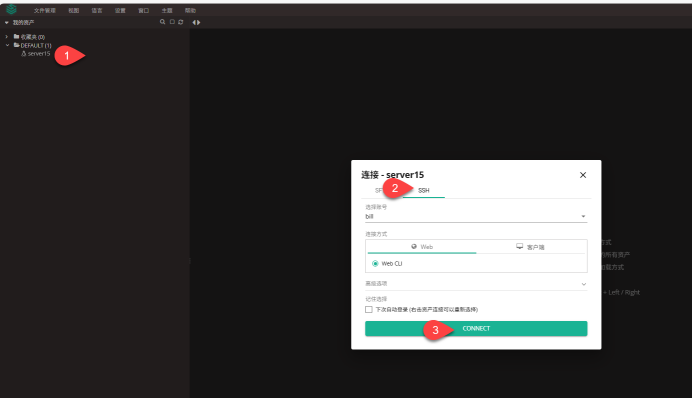
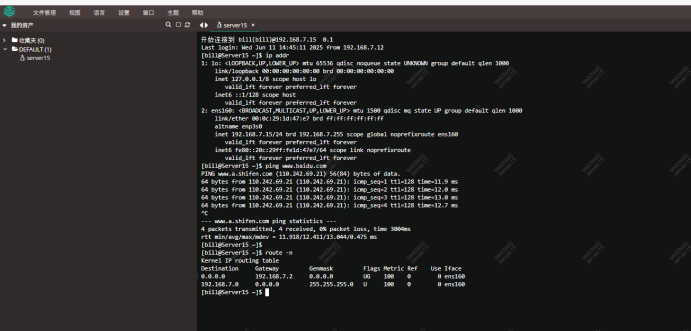
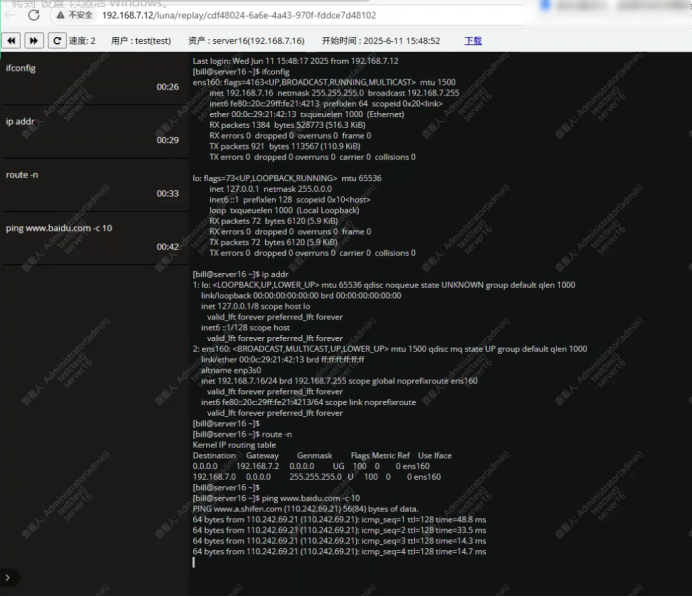
二十、在test下操作bill用户server15,留下操作记录


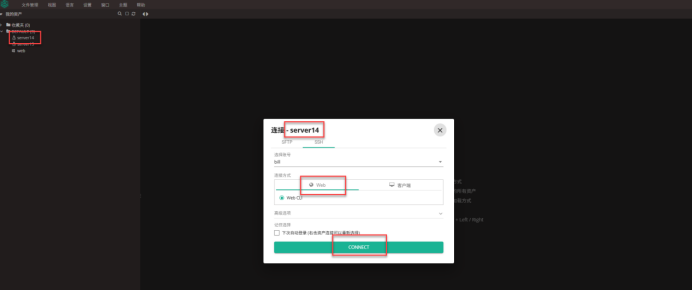
连接server15

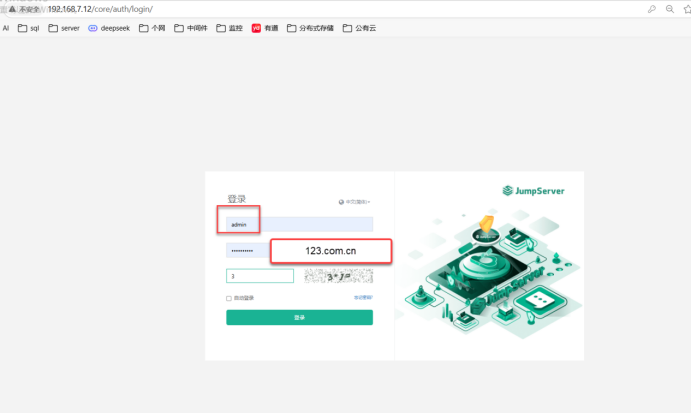
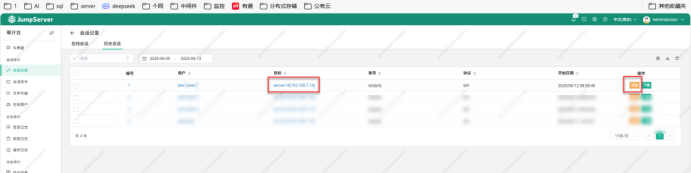
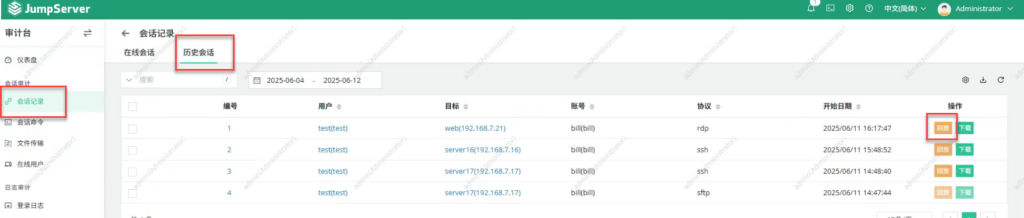
二十一、重新登录回admin server12账号:在admin 账号下查看test平台下的biil的行为监控记录:


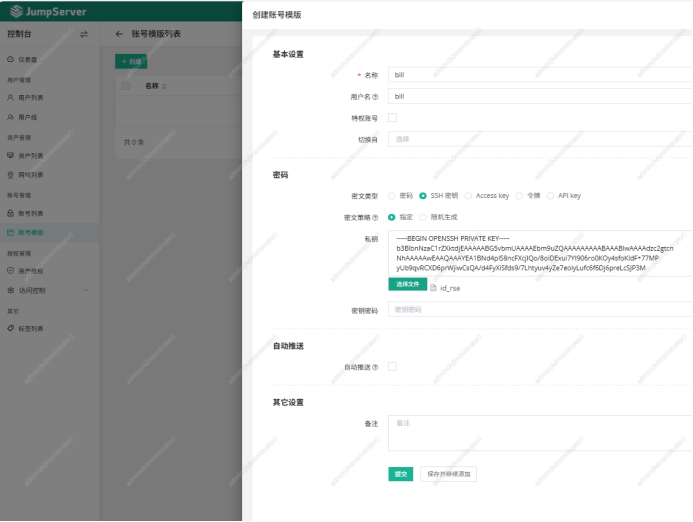
二十二、创建bill模板
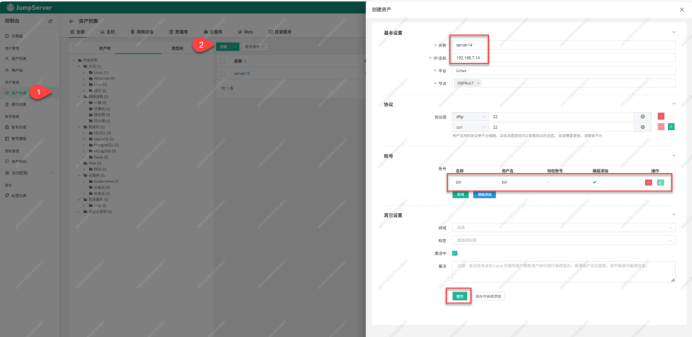
二十三、创建server14,使用server15 bill模板给server14添加到jump server里:
[root@sever14 ~]# vim /etc/chrony.conf
[root@sever14 ~]# systemctl enable --now chronyd
[root@sever14 ~]# chronyc sources -v

  .-- Source mode  '^' = server, '=' = peer, '#' = local clock.
 / .- Source state '*' = current best, '+' = combined, '-' = not combined,
| /             'x' = may be in error, '~' = too variable, '?' = unusable.
||                                                 .- xxxx [ yyyy ] +/- zzzz
||      Reachability register (octal) -.           |  xxxx = adjusted offset,
||      Log2(Polling interval) --.      |          |  yyyy = measured offset,
||                                \     |          |  zzzz = estimated error.
||                                 |    |           \
MS Name/IP address         Stratum Poll Reach LastRx Last sample
===============================================================================
^- time.cloudflare.com           3   6    37     9  +3860us[+3860us] +/-  116ms
^* time.neu.edu.cn               2   6    37     9    -11us[-3860us] +/- 9269us
^- a.chl.la                      2   6    37     5    +23ms[  +23ms] +/-  153ms
^? tick.ntp.infomaniak.ch        0   7     0     -     +0ns[   +0ns] +/-    0ns
[root@sever14 ~]# date
Wed Jun 11 03:05:11 PM CST 2025
[root@sever14 ~]# clocke -w
-bash: clocke: command not found
[root@sever14 ~]# clock -w
[root@sever14 ~]# useradd bill
[root@sever14 ~]# passwd bill
Changing password for user bill.
New password:
Retype new password:
passwd: all authentication tokens updated successfully.
[root@sever14 ~]#
[root@sever14 ~]# mkdir /home/bill/.ssh
[root@sever14 ~]# vim /etc/ssh/sshd_config
44 RSAAuthentication yes
 45 PubkeyAuthentication yes
 46 PubkeyAuthentication yes
 47
 48 # The default is to check both .ssh/authorized_keys and .ssh/authorized_keys2
 49 # but this is overridden so installations will only check .ssh/authorized_keys
 50 AuthorizedKeysFile      /home/bill/.ssh/authorized_keys
 51
 52 #AuthorizedPrincipalsFile none
 53
 54 #AuthorizedKeysCommand none
 55 #AuthorizedKeysCommandUser nobody
[root@sever14 ~]# systemctl restart sshd
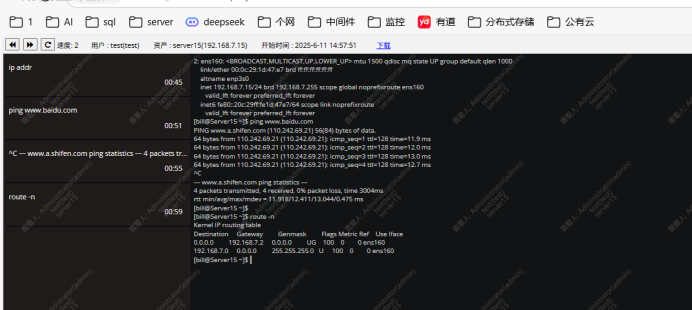
[root@sever14 ~]# ip addr
1: lo: <LOOPBACK,UP,LOWER_UP> mtu 65536 qdisc noqueue state UNKNOWN group default qlen 1000
link/loopback 00:00:00:00:00:00 brd 00:00:00:00:00:00
inet 127.0.0.1/8 scope host lo
valid_lft forever preferred_lft forever
inet6 ::1/128 scope host
valid_lft forever preferred_lft forever
2: ens160: <BROADCAST,MULTICAST,UP,LOWER_UP> mtu 1500 qdisc mq state UP group default qlen 1000
link/ether 00:0c:29:40:f2:95 brd ff:ff:ff:ff:ff:ff
altname enp3s0
inet 192.168.7.14/24 brd 192.168.7.255 scope global noprefixroute ens160
valid_lft forever preferred_lft forever
inet6 fe80::20c:29ff:fe40:f295/64 scope link noprefixroute
valid_lft forever preferred_lft forever
[root@sever14 ~]#
[root@Server15 ~]# scp /home/bill/.ssh/authorized_keys 192.168.7.14:/home/bill/.ssh/
The authenticity of host '192.168.7.14 (192.168.7.14)' can't be established.
ED25519 key fingerprint is SHA256:htKq7ZirIWLaYWODrNwza359NeFtKCnUUflfFROBZg8.
This key is not known by any other names
Are you sure you want to continue connecting (yes/no/[fingerprint])? yes
Warning: Permanently added '192.168.7.14' (ED25519) to the list of known hosts.
root@192.168.7.14's password:
authorized_keys 100% 567 1.8MB/s 00:00
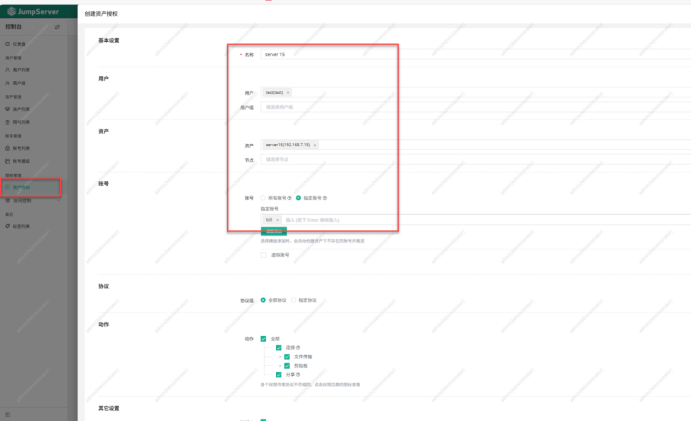
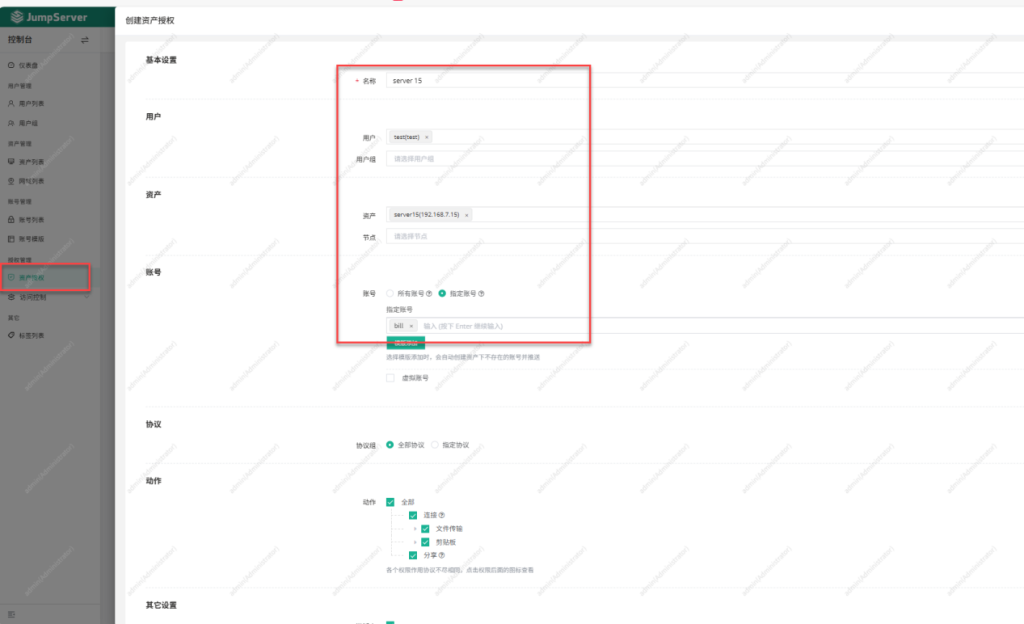
[root@Server15 ~]# 二十四、创建好server14容器后,在admin server12里添加server14的资产,并进行资产授权
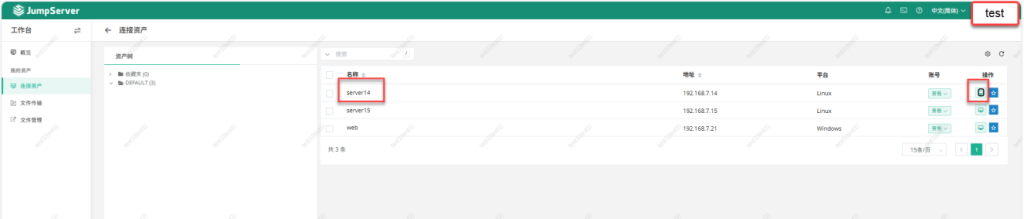
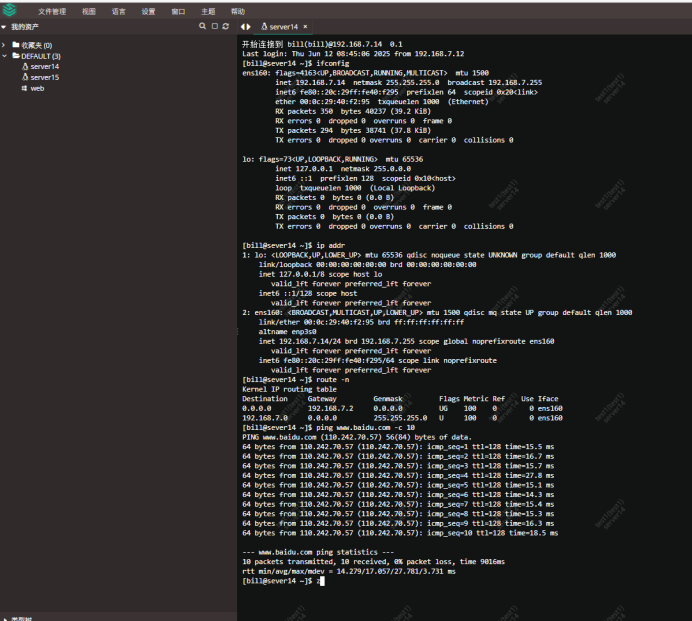
二十五:在test下操作用户server14,留下操作记录
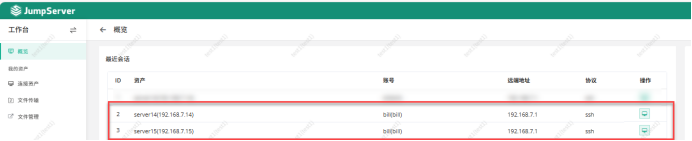
二十六、重新登录回admin server12账号:在admin 账号下查看test平台下的server14的行为监控记录:
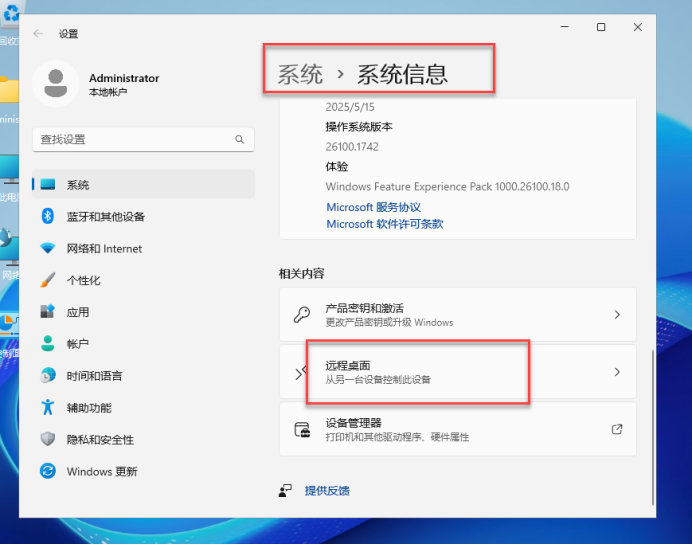
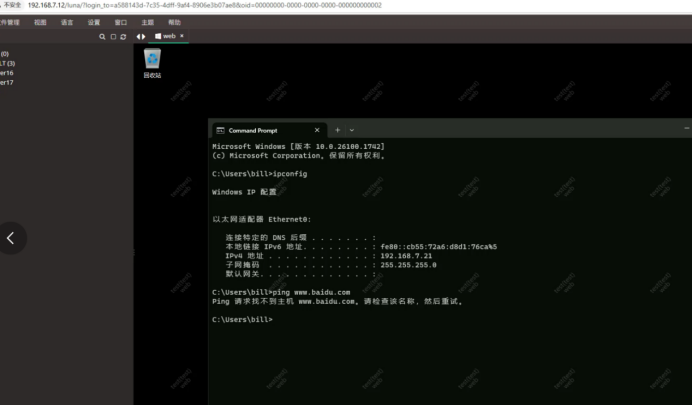
二十七、jumpserver监控wins2025
实验环境:
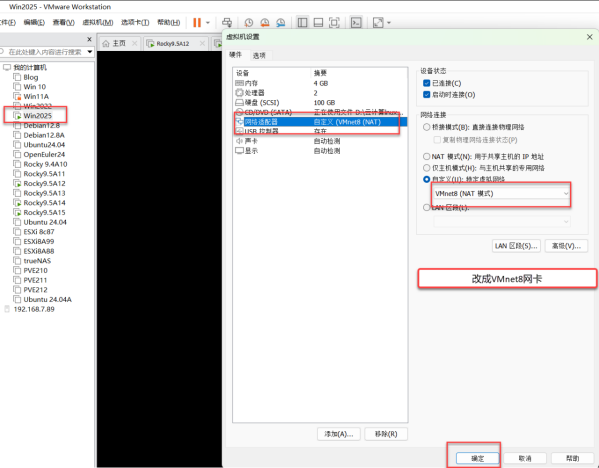
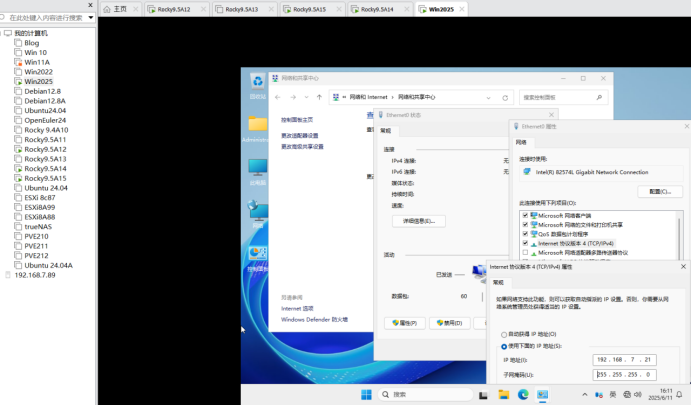
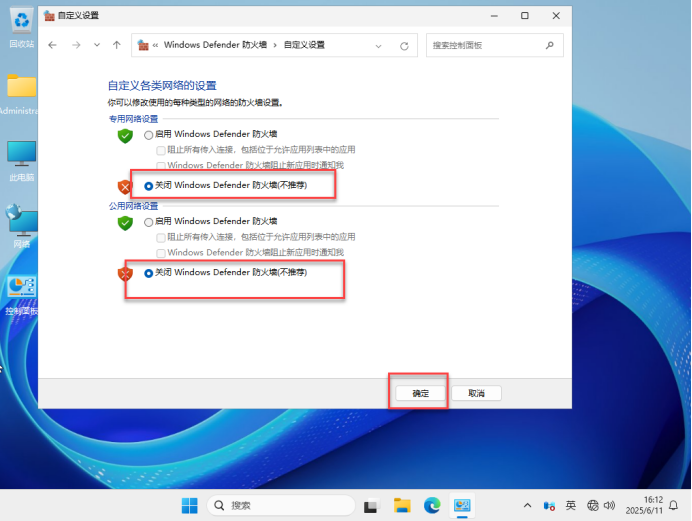
修改IP地址:7.21及关闭防火墙
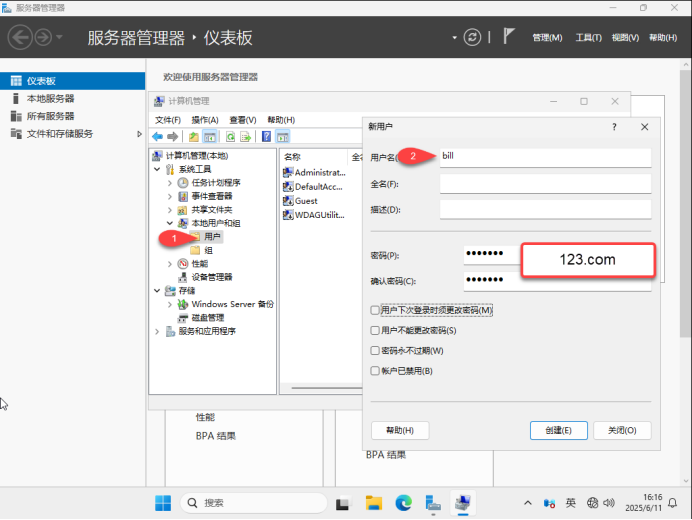
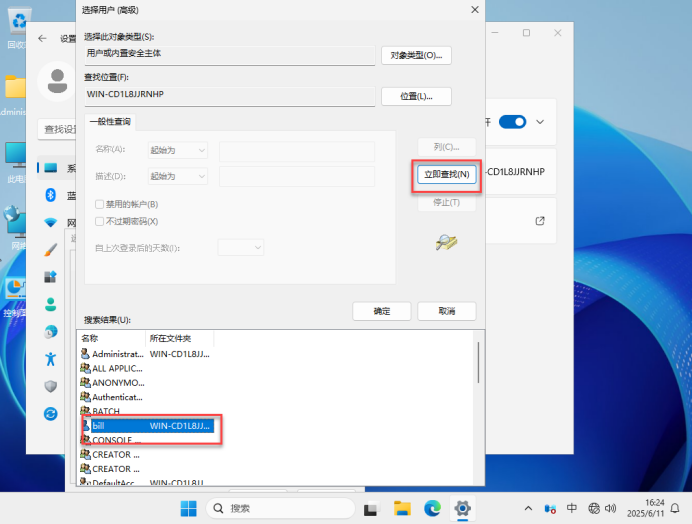
创建bill用户

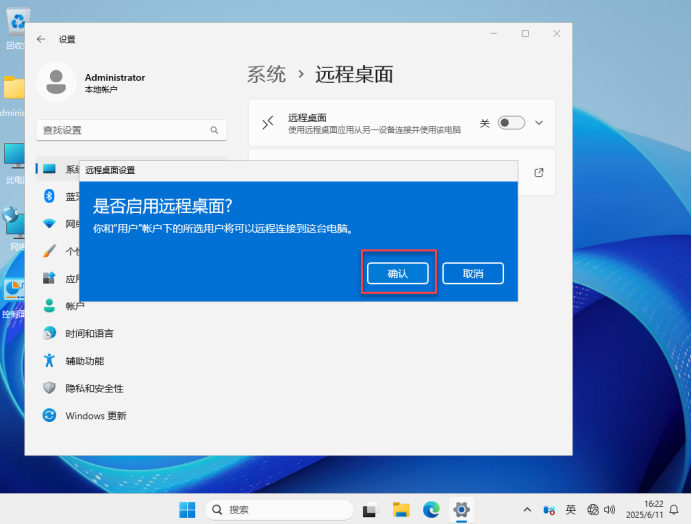
开启远程桌面
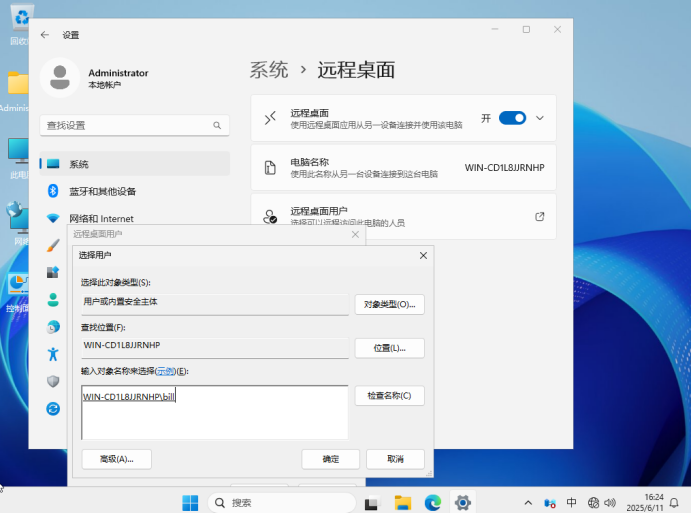
添加远程桌面用户:bill

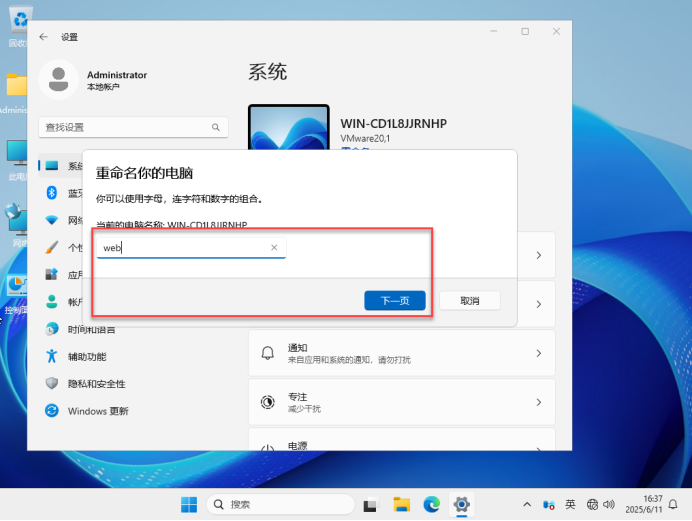
修改计算机名:
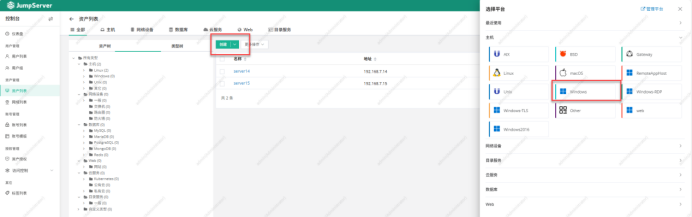
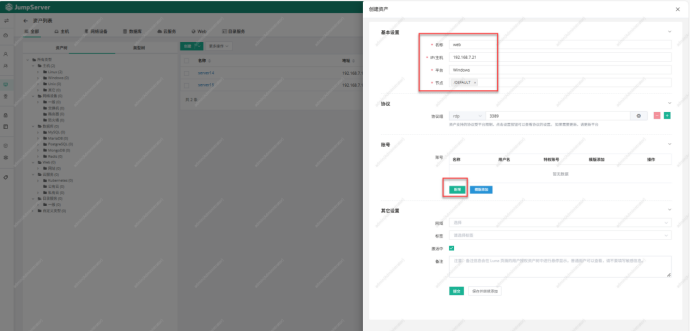
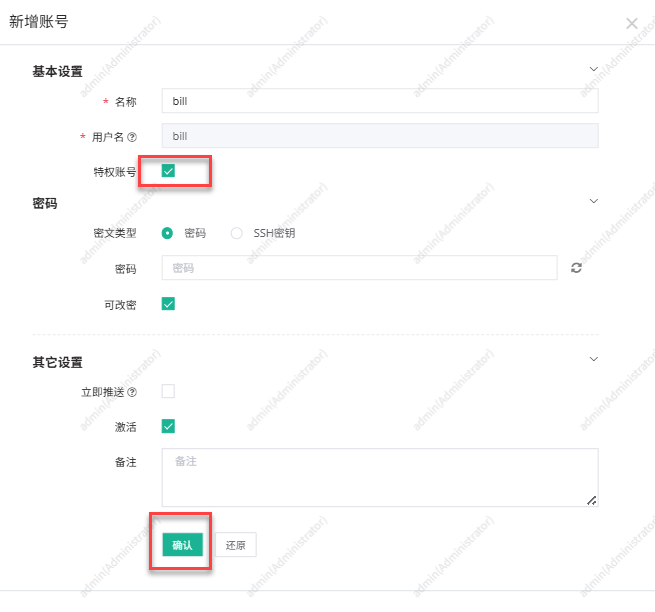
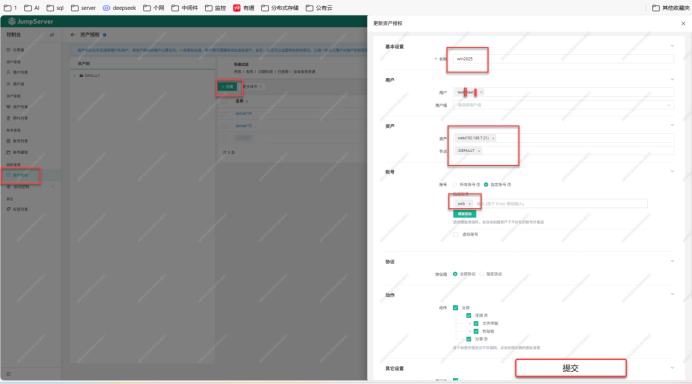
二十八:在admin server12下创建资产:web (win2025)
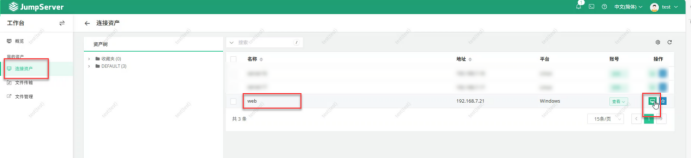
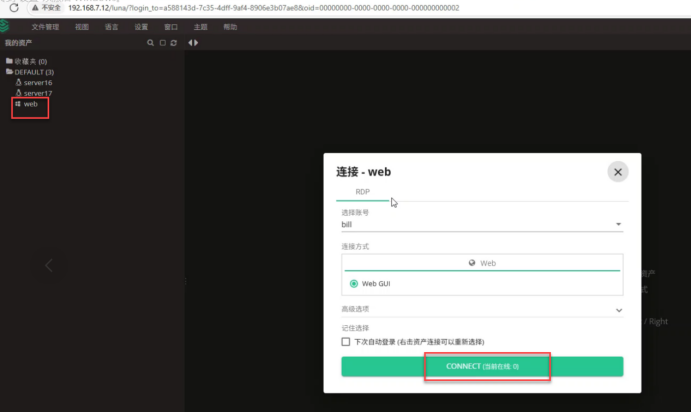
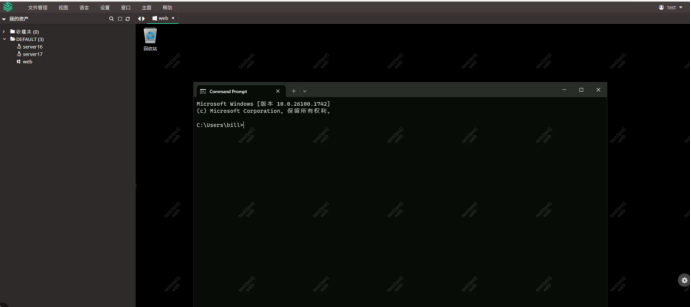
二十九、在test下操作用户web,留下操作记录
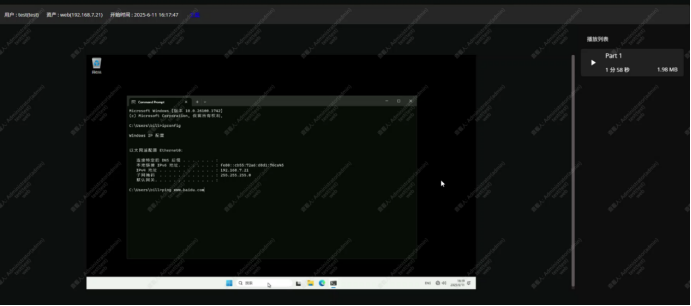
三十、重新登录回admin server12账号:在admin 账号下查看test平台下的web的行为监控记录:
=====================================================
知识点:
JumpServer 堡垒机符合运维安全审计 4A 规范
身份验证 / Authentication
防止身份冒用和复用
授权控制 / Authorization
防止内部误操作和权限滥用
账号管理 / Accounting
人员和资产的管理
安全审计 / Auditing
追溯的保障和事故分析的依据
8GB内存
jumpserver 192.168.7.10
一. 网站架构为什么要使用跳板机
总而言之一句话: 不想做背锅侠
二. 堡垒机的核心价值
1. 为什么要用堡垒机?
通过堡垒机控制IT系统运维的风险
2. 堡垒机有哪些好处?
管理者:
统一入口:登录公司的任何资源都通过堡垒机
批量管理:批量的管理服务器,比如: 批量的执行命令
自动运维:
安全运营:
身份鉴别:
账号管理:
权限控制:可以针对不同的用户指定访问不同的机器,还有禁用一个敏感的命令
安全审计:执行的每一个命令都有录屏的操作
注意事项:必须做时间同步